
LastStop Connect knowledge base
Set up your company workspace
Step-by-step guidance for accounts, licenses, domains and connectors. Each guide states what is available and what still needs implementation or provider verification.
Latest guide review 2026-09-14 · 105 guides
Download setup guide (PDF)Meet Nora, your TLS guide
Watch with Nora
AI-generated narration · 0:25 · English captions
Guided lesson · Reviewed 2026-09-13. Follow the written article for exact settings and current availability.
Listen to Nora’s voice
Crisp · standard · AI-generated voice sample
Sample transcript: “Hello, I'm Nora, your AI guide from Technology Last Stop. Welcome to LastStop Connect. I'll walk you through each setup, one clear step at a time. You can pause, replay, or follow the written guide whenever you need. We'll check the prerequisites, complete the setup, and verify the result together. Keep passwords, API keys, and customer information out of recordings and support screenshots. Let's get started.”
Nora’s welcome video is available above. Full setup lessons appear as each complete recording is retrieved and reviewed. Every guide remains available in writing.
105 guides found
Company setupStart a company portal
Owner-assisted setup
Create a company with its own Customer ID, users, product type and scoped settings. TLS retains owner administration.
Before you start
- A company administrator, legal business name, primary email domain and authorized billing contact.
- TLS owner approval, a paid agreement and access to the company DNS provider.
Steps
- Open /companies > Create company. Choose Company Workspace for a software customer or Managed Support for basic service access. Enter the company name and the registered domain you own. Your typed domain remains visible; a separate DNS-form hint explains internationalized domains. Enter a supported billing contact, or select Set up billing later to save onboarding without payment.
- Open Overview > Customer profile to add or update the actual billing contact, phone, industry and address information. New portals start with TLS support email, the TLS welcome message, America/Chicago time zone and TLS blue. Review Portal settings for customer-specific changes. Unknown business details must not be invented.
- Both products have company records, users, knowledge, requests, planned changes and authorized billing access. Paid Workspaces also have their own helpdesk, devices, integrations, passwords, security and company settings. Managed IT clients use the TLS support portal without workspace administration.
- In Licenses & billing, select Standard, Professional or Enterprise, at least five Managed IT users or ten Workspace users, and a monthly or 1/2/3-year prepaid term. Read the policies and record authorized acceptance. TLS records a cleared invoice payment or Stripe confirms payment before the plan and seats become active.
- After payment, the owner activates the workspace. Add company administrators, billing contacts and requesters in Users, then use the existing identity provisioning workflow.
- On first sign-in, every company account enrolls an authenticator, verifies its six-digit code and saves eight recovery codes. Owners, administrators, billing users and regular users all complete a second factor. TLS staff retain their separate LastStop Verify workflow.
- Open connect.techlaststop.com/portals. Choose Managed IT for TLS-managed support or Company Workspace for your own permitted tools. Pricing is publicly available at /pricing; authorized company billing is at /company?tab=billing.
- A branded connect.companydomain.com deployment and paid Dev/QA require owner-assisted domain, identity, deployment and acceptance steps.
Verify it works
- Company name, Customer ID and domain agree across billing and support.
- A second-company test account cannot read the first company’s tickets, files, invoices or API responses.
- Customer administrators cannot open TLS owner configuration or retrieve connector secrets.
If you get stuck
- A saved environment request only reserves an onboarding request. It does not create hosting or verify DNS.
- Contact TLS if the same email must administer several companies: the current identity model allows one client organization per email.
- Accented domains use their actual DNS form: atéssa.com and atessa.com are different domains. Use the one the company owns; its display name may retain accents independently.
- Billing email: the mailbox name before @ currently requires unaccented characters; accents in the domain after @ are supported. Do not substitute an address you do not own. Leave billing blank during onboarding and add a supported existing contact later. Creating onboarding does not send email or activate a paid subscription.
Read Nora’s prepared narration
Link to this guideCompany setupConnect your own domain
Owner-assisted setup
Use connect.companydomain.com for production, dev.connect.companydomain.com for clean Dev and qa.connect.companydomain.com for a sanitized QA replica.
Before you start
- DNS administrator access and an isolated deployment assigned by TLS.
- A unique production hostname; never point two customers at the same data store.
Steps
- In Companies > company > Settings, add the company subdomain. Only a subdomain under that company's primary domain is accepted. Copy the displayed _laststop TXT verification name and value to the authoritative DNS provider.
- Choose Verify ownership after DNS propagation. This verifies ownership only; it does not activate hosting or HTTPS.
- In Billing > Company environments, request connect.companydomain.com, dev.connect.companydomain.com or qa.connect.companydomain.com. Replace companydomain.com with your registered company domain. TLS assigns the isolated deployment and registers its custom domain; each receives its own hosting CNAME and TXT verification values.
- Add the exact deployment-specific CNAME and TXT records. Do not change MX or unrelated root/www records. Existing conflicting records at the requested hostname require review before replacement.
- Wait for active domain routing and HTTPS. Configure customer-specific identity callbacks, webhook URLs, sender identity and native app links in that deployment. Remaining TLS-specific identity and sender assumptions must be removed before independent activation.
- Check HTTPS, correct-company login, logout, cookies, deep links, notification URLs and two-company negative access. A DNS ownership check alone is not an accepted portal.
Verify it works
- Hostname opens the correct company and HTTPS is active.
- Wrong-host cookies and unapproved OAuth callback URLs fail.
- Outbound notifications link to the same customer domain.
- Open the ready production, Dev and QA links in separate tabs. Refreshing one tab leaves the others open; every tab still enforces its own session and company permissions.
If you get stuck
- Pending DNS: check the exact hostname, record value and propagation at the authoritative DNS provider.
- Login returning to TLS production means the provider callback/source configuration is still TLS-specific; do not activate the customer domain.
Provider documentation
Read Nora’s prepared narration
Link to this guideCompany setupUsers, roles and paid seats
Available workflow
Company administrators manage their own users; billing contacts manage purchases; TLS owners retain platform and deployment authority.
Before you start
- An active company and verified contacts.
Steps
- Open Companies > company > Users as the owner, or Company > Users as a company administrator. Add a full name, an address within the registered primary domain and the appropriate role.
- Choose one canonical company role: Company owner, Company administrator, Support manager, Security administrator, Device manager, Knowledge manager, Billing administrator, Auditor, Company user or Executive viewer. Legacy client_admin, billing, requester and executive records map safely to their canonical replacements. No company role grants TLS staff, platform-owner, deployment or secret-vault authority.
- Create a manual access group for immediate company-only role assignment. For a dynamic Microsoft Entra, Google Workspace, Okta or OneLogin group, open Provider membership and synchronization, read the group, explicitly link immutable provider identities to existing active company users, then review and enable synchronization. Matching email addresses alone never grant access. See the Company identity-group synchronization guide.
- Use a temporary delegation for a specific permission and business reason. Delegations expire within 30 days, can be revoked early and never change the user’s base role. Company owners cannot create another Company owner, and Company administrators cannot create peer administrators; TLS retains platform authority.
- Pending invitations, active and inactive non-deleted users reserve a paid seat. Add licenses in Billing before adding or restoring a user beyond capacity.
- Use Activate access after adding an approved user. Identity provisioning requires the configured production service; test environments do not invoke production identity activation.
- Use Disable or Revoke sessions for immediate access changes. Delete uses the existing 60-day recovery workflow; restore is checked against the current paid seat limit.
- Keep at least one active company administrator. Database constraints protect this rule even if two administrators attempt a change at the same time. Paid-term expiry preserves access to billing while service access requires renewal.
Verify it works
- A Company user cannot change prices, approve payments or view other-company records.
- A company administrator cannot promote themselves, assign a peer administrator, create a Company owner or obtain TLS platform permissions.
- An extra user beyond the paid seat count is rejected, including concurrent requests.
If you get stuck
- Account at its limit: request more seats or remove a departed user through the documented offboarding flow.
- A pending invite still consumes a seat. Do not assume inactive means unlicensed.
Read Nora’s prepared narration
Link to this guideSecurity and governanceCompany identity-group synchronization
Four direct-membership adapters and scheduled worker implemented; company credentials, reviewed links and live scheduler acceptance required
Read Microsoft Entra, Google Workspace, Okta or OneLogin groups and grant a company role only to explicitly linked active company users. No user is created or linked by email similarity.
Before you start
- An active Company Workspace and an authorized TLS owner or company role administrator. Existing company users must already have their own approved accounts.
- A protected company Microsoft 365, Google Workspace, Okta or OneLogin connection in Licenses. Its status must not be paused or in Trash. Dedicated credentials are recommended.
- Microsoft: Graph application permissions GroupMember.Read.All and User.Read.All with administrator consent. Hidden-membership groups also require Member.Read.Hidden.
- Google: domain-wide delegation for admin.directory.group.readonly and admin.directory.user.readonly, a delegated administrator and the actual customer ID beginning C.
- Okta: a token issued to a dedicated read-only administrator with access to the mapped group and users. OneLogin: a dedicated Read All API credential pair. A OneLogin group ID differs from a OneLogin role ID.
Steps
- Open Companies > company > Users as the TLS owner, or Company > Users as a company administrator. Under Access groups, create a Dynamic identity-provider group with its immutable group ID and a permitted company role. Company owner, company administrator and TLS roles cannot be inherited from these groups.
- Open Provider membership and synchronization > Read provider members. This performs provider reads and shows returned identities and status. Previewing does not grant permissions or create a sign-in binding.
- For each approved active provider member, select the verified existing company user and Save identity link. Compare the provider’s immutable ID and the person’s company account. Connect re-reads membership before saving. Do not link solely because two displayed email addresses match.
- Review saved links and the group role, select the explicit authorization checkbox, then Enable and synchronize reviewed links. Only linked active members receive inherited permissions. Unmapped people, inactive or unavailable accounts, nested groups and external/guest identities do not receive inherited access from this snapshot.
- Review the last attempt, reported result and grant expiration. The scheduled worker selects groups due after five minutes, with a bounded batch per invocation. Confirm that the hosting scheduler actually invokes it in your production deployment. An installed scheduled handler is not proof of successful scheduled operation. Use Sync now for a direct acceptance test.
- Remove a linked person from the provider group and run Sync now. The inherited role must disappear on the next authorized request. The person’s independent base company role and sign-in account remain unchanged.
- A complete successful snapshot authorizes group access for at most one hour. Failed pagination, provider errors or a failed database batch retain the previous complete snapshot without extending that deadline. Stale inherited permissions expire even if no background job runs.
- Pause inherited access to revoke the group’s inherited permissions immediately. Pausing a group or its directory credential source also pauses inherited access. Unlinking or changing an identity link requires review and explicit enable again. Credential replacement, a recreated source or a different provider tenant cannot silently reuse current grants.
- Test with dedicated provider tenants before customer acceptance. Production provider calls remain disabled in Dev and QA. Retain the provider authorization, identity review, successful sync/removal evidence and scheduled-run evidence in the company’s approved records system.
Verify it works
- Previewing a group with an email identical to a company user does not grant access. Only a reviewed immutable identity link plus explicit enable can grant the mapped role.
- Another company’s users cannot be linked or changed. The group cannot grant owner or administrator roles, create users, alter vendor memberships or modify sign-in identity bindings.
- Removed provider members lose group-derived permissions after a complete sync. Failed pages preserve the prior snapshot; expired grants and paused sources cannot authorize access.
- A result arriving after a pause, link change, credential revision or group change cannot overwrite the new state. Database failure rolls the membership transaction back.
- Provider scope is direct human membership. Microsoft uses active Member directory accounts; Google requires active membership and an unsuspended, unarchived user in the configured customer; Okta requires ACTIVE; OneLogin requires active users with consistent group membership.
- The last-attempt timestamp advances through real scheduled runs. The reader supports at most 1,000 direct human members and bounded directory pages; oversized groups fail without partial grants.
If you get stuck
- Directory credentials required: configure the same company’s supported connection in the license center. A generic SSO catalog setting is not sufficient authorization for directory reads.
- Preview changed: credentials or the provider scope changed. Read members again and review the current links before enabling.
- Identity already linked: verify the existing association. Unlink deliberately before assigning the provider identity to a different company user.
- Missing read permissions, hidden-group errors or rate limits: correct the provider’s dedicated application permissions or wait for the documented limit, then retry. Provider response bodies and tokens are not shown.
- No scheduled attempts: verify the production hosting schedule. Manual Sync now remains available, and stale permissions expire after one hour. Do not assume a scheduler is running because synchronization is enabled.
- Large groups or directories: split the approved access rule into appropriately scoped groups or arrange a separately reviewed directory integration; Connect does not accept a partial snapshot as complete.
Provider documentation
- learn.microsoft.com — reference 1
- developers.google.com — reference 2
- developers.google.com — reference 3
- developer.okta.com — reference 4
- developers.onelogin.com — reference 5
- developers.onelogin.com — reference 6
Read Nora’s prepared narration
Link to this guideBillingConfigure Stripe billing and license purchases
LIVE key and portal verified; payment lifecycle acceptance remains required
Card details stay on Stripe-hosted pages. New entitlements follow verified payment state, not the browser return URL.
Before you start
- TLS owner access; the authorized TLS Stripe live account and approved catalog. Tax obligations and applicable registrations need separate review.
- A separate Stripe test configuration and a webhook endpoint accessible to Stripe.
- A separate restricted application key: read the account, Products/Prices and Customer Portal configurations; write Customers, Checkout Sessions, Subscriptions, Invoices and Customer Portal sessions. Tax settings/registration read is needed only when automatic tax is selected. Verify these permissions through the protected setup action.
Steps
- The TLS live catalog contains Company Workspace Standard $19, Professional $39 and Enterprise $69, and Managed Support Standard $79, Professional $129 and Enterprise $199 per user/month. Company Workspace has a ten-user minimum; Managed IT has a five-user minimum. Each tier has monthly and prepaid 12-, 24- and 36-month recurring prices, with 8%, 12% and 15% term discounts. Verified nonprofit and education organizations receive a separate 15% community rate across all six tiers through an exact reviewed quote. Legacy agreements retain their own catalog. Creating products does not charge customers.
- TLS production LIVE key and customer portal verification are complete as of September 14, 2026. Preserve that verified configuration. For a new or isolated test deployment, open Companies > company > Billing and use the protected provider setup form with its own restricted TEST API key, catalog and webhook secret. A connected payment-management app does not install the application credential.
- Production and QA have separate Stripe webhook endpoints at their respective /api/commercial/webhook URLs, API version 2026-08-26.dahlia. Both subscribe to Checkout completion/asynchronous result, subscription update/deletion and invoice created, updated, finalized, paid, payment succeeded/failed, voided, uncollectible and deleted events. The exact POST callback verifies the raw signature without a browser session; the surrounding QA pages and finance APIs remain owner-protected. A signing secret is not an API key.
- Configure a Stripe customer portal: enable invoice history and payment-method updates, cancellation at the end of the paid period with no proration, and disable plan/quantity changes. Open Customer billing portal settings for the direct link. Use the account default or enter its bpc_ configuration ID in the protected setup form. Saving an ID is not verification: the app reads the configuration through its key, validates the settings and matching mode, and pins later sessions to it.
- In the company Plans & billing page, review the secure payment-method summary. Only provider name or card brand, last four digits, default state and expiration are displayed. Full card numbers, bank account numbers, routing numbers, security codes and security answers are never collected by Connect. Use Manage billing securely to add or replace a method on Stripe's hosted page.
- Verify the 60-, 30- and 7-day expiring-card notice stages and the expired-card notice with a Stripe TEST customer and approved synthetic billing inbox. Confirm the work item is retained after dismissal, and confirm provider acceptance separately from inbox receipt.
- Choose Verify account and prices. The app checks the Stripe account, USD, licensed pricing, each installed plan amount and all intervals. Read and accept the order policy before a new plan checkout or invoice request. Enable automatic tax only after active registrations are confirmed. Test checkout remains owner-only.
- Run initial purchase, declined card, partial payment, duplicate/out-of-order webhook, additional-seat approval, renewal, cancellation, grace expiry and recovery tests with dedicated TEST credentials. Check paid seats, invoice ownership, cash evidence and actual page state after every case. The native September 14 synthetic invoice test passed draft to finalized to void with no payment; successful-charge acceptance is still open.
- For extra seats, request the current invoice estimate and explicitly authorize payment. Quotes expire after five minutes; paid entitlement is updated only after canonical subscription/invoice checks.
- Run provider acceptance with the actual production key and confirm webhook delivery, checkout, receipts and cancellation. Verify account and prices resets activation when credentials or catalog revision change. After acceptance, the owner-authorized release sets CONNECT_BILLING_LIVE_APPROVED=true in production and redeploys. Dev and QA reject live credentials. Authorizing a payment-management connection alone does not enable portal checkout.
Verify it works
- A canceled checkout or unpaid invoice grants no extra seats.
- A duplicate event cannot double licenses; a different company’s subscription is rejected.
- Webhook signature verification, HTTPS, invoice emails, taxes and receipt references work in the actual provider account.
- An old saved test configuration cannot override the deployed live catalog. A key from the wrong mode is rejected; configuration changes require verification again.
- Saving changed provider settings clears the previous verification date and disables checkout. Run Verify account and prices again; the panel must not show an old verification as current.
- A missing customer portal, immediate cancellation, invoice proration on cancellation or direct plan/quantity changes cannot pass verification. Customer portal sessions use the verified configuration ID.
- Current Stripe invoice status and paid/remaining cents determine settlement; the removed invoice.paid flag is not required. Partial payment never activates unpaid additions. A paid adjustment cannot clear an older unpaid renewal.
If you get stuck
- Payment setup required: install the restricted application key, verify the legacy and new plan catalogs, and review the live release gate. The Stripe plugin connection is not a runtime API key.
- Quote expired: refresh and request another estimate.
- Existing checkout with different seats: complete it or wait for its 30-minute expiry before changing quantities.
- If the webhook is private/unreachable, do not activate billing. Use a provider-approved test delivery path in an isolated test deployment.
- Payment connection authorized but Application API key says Required: finish the protected key form in the portal. The authorization and the application key are separate. Never paste keys into chat.
- Customer billing portal setup required: save the settings in step 4 in the matching Stripe mode, then select that configuration or the account default and verify again. The application key needs read access to Customer Portal configurations. A connector without portal-write permission cannot create it for you.
- QA webhook 401 indicates a browser-session gate intercepted the provider callback. Use the released exact signed POST handler; do not remove the owner gate from finance pages. A valid invoice event with a configured mode and signing secret waits in the durable queue if the dedicated TEST API key is missing. Other lifecycle events remain unavailable until that key is installed; no paid entitlement is granted by queuing an event.
Provider documentation
- docs.stripe.com — reference 1
- docs.stripe.com — reference 2
- docs.stripe.com — reference 3
- docs.stripe.com — reference 4
- dashboard.stripe.com — reference 5
- dashboard.stripe.com — reference 6
- dashboard.stripe.com — reference 7
- docs.stripe.com — reference 8
- docs.stripe.com — reference 9
- docs.stripe.com — reference 10
Read Nora’s prepared narration
Link to this guideOperationsDevelopment, QA and release promotion
Trusted same-account sign-in implemented; external provider acceptance separate
Start in Development, freeze and validate in QA, then promote the same application code to Production. Your existing production owner account grants Dev/QA access.
Before you start
- Your existing approved TLS owner account and its registered Verify method; separately deployed Dev and QA Sites.
- A distinct database, object storage and vault key per environment. Dedicated provider test accounts are needed for external integration testing.
Steps
- From the main Connect owner portal, use the visible Dev, QA or Company Workspaces buttons. They open separate tabs directly. Open Domains & access for provisioning details. Requested TLS addresses are dev.connect.techlaststop.com and qa.connect.techlaststop.com; until DNS and HTTPS activate, the Dev and QA buttons use the available private native addresses. Open Domains & access > Dev and QA DNS records to copy the exact GoDaddy Type, Name and Value for TLS. Each hostname needs its CNAME and both TXT records; the GoDaddy names already omit techlaststop.com.
- Open Dev or QA directly and choose Continue with your existing account. If needed, complete Microsoft, Google or password sign-in and your existing LastStop Verify method at the trusted production identity service. You do not need to open production manually first or create a second account. The environment receives its own protected session.
- Owners have automatic app-level access. Grant existing staff Development or QA access in Environments. Production validates the current account, role, environment permission and LastStop Verify state, then issues an encrypted, request-bound, one-use grant that expires after 60 seconds. The environment synchronizes the approved staff profile and creates a separate session for no more than eight hours. Sign in again to refresh role and profile changes; revoking the local environment session takes effect immediately. Sites owner-private audience remains an additional hosting restriction; a staff app grant does not change that audience.
- Keep external actions isolated. Local tickets, chat, images and knowledge can be exercised using synthetic data; outgoing email is suppressed. Provider actions, device commands and production identity provisioning remain isolated. Live Stripe credentials are refused outside production.
- Build the change in Development. Freeze the application source, lockfile and migration set; copy that same code to QA. QA covers roles, company isolation, payment failures, session lifecycle, upload boundaries and the intended device/browser journeys.
- Record validation in the owner Environments page with the source commit, artifact checksum, environment and evidence. A QA pass requires a prior Development pass for the same identifiers; Production requires QA. This records evidence and does not itself invoke Sites deployment.
- Publish the accepted code through the owner deployment workflow. Perform a short production health check for routes, sign-in, migrations and environment-specific providers. Full QA is repeated when code changes; a prior test cannot guarantee a different runtime configuration will succeed.
- Professional includes limited clean Dev for five test users; Enterprise includes ten, after provisioning. Standard has no included Dev. QA is $79/month; the separate Dev + QA bundle is $99/month. The Configuration replicas & recovery guide describes encrypted settings transfer, verification, retry and rollback after TLS allocates an isolated target. Hosting allocation, full production cloning, capacity and customer federation remain unfinished. A request is not a deployed replica or an automatic charge.
- Use dev.connect.techlaststop.com and qa.connect.techlaststop.com for TLS. Companies use dev.connect.companydomain.com and qa.connect.companydomain.com. Registered custom aliases return sign-in to the same hostname that started it; an unregistered hostname is rejected. Do not activate a preferred address until Sites reports active routing and HTTPS.
Verify it works
- Each environment has its own database and bucket; no production secrets or customer data were copied.
- New migrations are additive and applied before the matching code is used.
- A production send or charge cannot be initiated from an isolated environment.
- Open in new tab is readable at mobile and desktop widths, keeps the complete label and does not open an embedded environment.
- The company environment request form fills connect.companydomain.com, dev.connect.companydomain.com or qa.connect.companydomain.com for the selected company and environment. Changing companies must not retain the previous company’s hostname.
- Previously requested, unverified company hosts using connect-dev.companydomain.com or connect-qa.companydomain.com are normalized to dev.connect.companydomain.com or qa.connect.companydomain.com. Verified custom hosts and custom alternatives are not renamed by this audited update.
If you get stuck
- If environment sign-in fails, use the displayed ENV reference: COOKIE or STATE means the browser handoff was missing or expired; REJECTED means the encrypted one-use grant, request binding or trusted key was rejected; RESPONSE or STORAGE means the received session could not be established. ENV-NETWORK applies only to a legacy handoff during staged deployment. Retry once from the environment link. Do not reset Verify or paste cookies into support messages.
- Pending custom domain: use the working private URL and add the exact CNAME/TXT values in the DNS instructions. Wix reports no managed DNS zone for techlaststop.com in the connected account.
- A private hosting audience blocks anonymous external webhooks. Keep it private until an approved provider test endpoint or intended audience has been configured.
Provider documentation
Read Nora’s prepared narration
Link to this guideAPIsAPI access and safe automation
Session APIs; public partner API pending
Existing application APIs use authenticated portal sessions and server-side roles. A general customer API-key product is not implemented.
Before you start
- An approved account and the relevant permission.
Steps
- Use the documented portal screens for supported workflows. Do not export your browser session cookie to scripts or third parties.
- Open Command Center > Integrations and choose the provider. Record the connection creation date, protected credential-storage date, last update and provider expiration. If the provider does not return an expiration, leave it Unknown and set a reviewed rotation date instead of inventing one.
- Create a credential in the vendor's authorized developer or administrator console with the minimum required scopes. Copy it once into the protected Connect configuration, save it, then remove it from notes, clipboard history and screenshots. Never place a token in a ticket or article.
- Run Verify or Test connection. Saving is not verification. Confirm the intended provider account and company, at least one permitted read, one denied out-of-scope action, and the displayed last-check time.
- Before expiry, rotate in the vendor console, replace it in Connect, verify again, and revoke the old value. Connect creates a deduplicated maintenance ticket and work-item reminder within 30 days of a recorded expiration; confirm configured owner email delivery separately.
- For a new third-party API integration, request a scoped service identity and a versioned API contract from TLS. Do not assume /api routes support API keys.
- Agree on company scoping, webhook signatures, pagination, rate limits, idempotency, retry limits, logging and a revocation process before building automation.
- Use provider test accounts and synthetic records to prove create/read/update/delete behavior. Test foreign company IDs and unknown fields as negative cases.
- Publish the integration’s supported operations and known limits only after provider acceptance. The maintained KB article must include numbered setup, save, verification and rollback steps plus a protected redacted screenshot that shows the exact control to use.
Verify it works
- Anonymous API calls fail; wrong-company access fails; secrets never appear in responses.
- Retries cannot duplicate paid seats, tickets or messages.
If you get stuck
- 401: sign in. 403: request the proper company role. 428: complete LastStop Verify. 402: review the paid term. 429: follow the documented retry delay.
- Do not treat the public /api/deployment status as an authentication mechanism.
Read Nora’s prepared narration
Link to this guideApplicationsDesktop, mobile web and native applications
Web available; native acceptance pending
Use the responsive browser portal while Apple/Google distribution and device-specific checks are completed.
Before you start
- A supported current browser; approved company login; for native distribution, organization-controlled Apple/Google accounts and signing keys.
Steps
- On desktop, test sign-in, verification, tickets, attachment download, billing, settings and logout. Repeat with keyboard navigation and zoom.
- On iOS Safari and Android Chrome, test the same workflows in portrait and landscape, the soft keyboard, file picking, touch targets, back navigation and session expiry.
- Use the portal’s available installation flow for supported web-app installation. Browser installability does not establish App Store or Play approval.
- For a dedicated customer native app, TLS must configure package/bundle IDs, icons, signing, associated domains, universal/app links, push credentials and OAuth return handling for that company’s domain.
- Use TestFlight and Google Play internal testing on real devices before production submission. Keep signing credentials in the distribution platform.
Verify it works
- A link returns to the intended environment; logout clears protected access.
- No content is hidden by the phone keyboard; all controls remain reachable.
- Native sign-in and push notification behavior are verified on physical devices, not inferred from desktop screenshots.
If you get stuck
- An app opening TLS production instead of the customer domain requires a corrected build configuration.
- Provider/store approval and RMM installers remain separate acceptance gates; browser support can launch independently.
Read Nora’s prepared narration
Link to this guideApplicationsRMM agents and remote operations
Agent workflows require device acceptance
Company asset and diagnostic administration is separate from a basic support client’s own-device view. Enrollment and a working agent remain required before a queued diagnostic can execute.
Before you start
- A test machine, company/device association and a supported signed package.
Steps
- In a paid Company Workspace open Devices. Register an asset against an existing company user, edit notes, search assets and inspect health. Online enrolled agents with active certificates can accept inventory refresh, health checks, patch scans and BIOS scans. The company can cancel its queued diagnostics; it cannot issue arbitrary shell or destructive commands from this workspace.
- Review the RMM module’s actual supported commands and target platform before selecting a package.
- Enroll one disposable test endpoint in the isolated environment. Check the organization/device IDs before distributing an installer.
- Verify heartbeat, inventory, reconnect after reboot, expired enrollment, command authorization and audit records.
- Test update and uninstall, revoked-device rejection and recovery from a failed command.
- Release signed Windows/macOS packages only after malware scanning and real-device checks. Store builds and vendor RMM connections are separately licensed and approved.
Verify it works
- Company A cannot see or execute commands on company B’s devices.
- A revoked device or expired enrollment cannot reconnect.
- Destructive commands require the established approval and user-consent workflow.
If you get stuck
- A downloaded builder is not proof of a working installed agent.
- Third-party Datto/Kaseya/NinjaOne sync is not implemented in this release; use its status-specific connector article.
Read Nora’s prepared narration
Link to this guideOperationsSupport, export and offboarding
Owner-assisted process
Keep the customer’s administrator in control of business access while TLS handles restricted platform operations.
Before you start
- Verified customer administrator request and an agreed retention policy.
Steps
- Identify the company by Customer ID and domain before making changes. Log the request and the authorizing person.
- For support, start with the user role, environment, time, action and redacted error. Do not ask customers to email passwords, JWTs or API secrets.
- For employee departure, revoke access and sessions promptly; review connected provider identities and device enrollment.
- For company exit, agree on data export scope, supported formats, attachments, contractual retention and deletion date. Export only that company’s data and verify a sample restore.
- Cancel future billing at the agreed term boundary, settle outstanding invoices and revoke company-specific provider credentials and domain bindings.
- Use a reviewed deletion workflow and preserve only required records. Full automated company export/deletion and customer-controlled residency are not yet implemented.
Verify it works
- Export contains only the selected company’s records.
- Departed users, revoked keys and removed domains cannot regain access.
If you get stuck
- A completed billing cancellation does not prove provider keys or devices were revoked. Check each system separately.
Read Nora’s prepared narration
Link to this guideCommunicationsRingCentral business SMS
Implemented; provider/device verification required
Required configuration fields: clientId, clientSecret, jwt
Before you start
- A paid RingCentral account, SMS-enabled number assigned to the JWT user, and the applicable messaging registration/verification.
- TLS number +18888578506 remains subject to port completion and provider SMS readiness; a subscription alone does not enable SMS.
Steps
- In RingCentral Developers, create a private server-side JWT app. Add SMS, ReadMessages, ReadAccounts and WebhookSubscriptions permissions.
- Create an active JWT credential authorized for that app and account. Store the client ID, client secret and JWT only in the protected RingCentral panel.
- Open Integrations > RingCentral. Save credentials and run the connection/number checks. Keep the requested sending, inbound, HELP and on-call switches enabled.
- Verify the provider reports SmsSender for the configured sender and an active subscription for /api/integrations/ringcentral/webhook.
- Record affirmative recipient consent with evidence. Use an approved test recipient to test outbound, inbound, delivery status, STOP, HELP and re-opt-in.
- Do not silently substitute the temporary voice number as an SMS sender. Per-company sender and callback configuration still require dedicated implementation; the current connector targets TLS.
Verify it works
- An unavailable sender reports pending readiness and no message is sent.
- STOP blocks further operational sends; repeated webhook delivery does not duplicate messages.
- Check both provider delivery and the recipient handset before claiming SMS works.
If you get stuck
- Check the exact environment, credential expiry, assigned permissions and provider response. A saved credential is not evidence of a successful business workflow.
- Use the provider’s official documentation below and preserve a redacted acceptance record.
Provider documentation
Read Nora’s prepared narration
Link to this guideInternal AIOpenAI support copilot
Implemented; provider/device verification required
Required configuration fields: OPENAI_API_KEY, OPENAI_PROJECT_ID
Before you start
- An organization-owned OpenAI API project and project service credential; API usage has its own billing and usage limits.
Steps
- Use a dedicated company project and the approved secret-creation workflow. Set project budgets and allowed models.
- Configure the protected API key/project fields in the copilot setup. Use the company-owned API service credential.
- Review which ticket fields can be sent to the provider and remove passwords, tokens and unnecessary personal data.
- Test draft, rewrite, summary and troubleshooting on synthetic tickets. A technician reviews and sends final responses.
- Verify usage limits, provider failure feedback and auditability.
Verify it works
- Drafting does not automatically send customer messages or execute device commands.
- A provider failure preserves the ticket and the technician’s draft.
If you get stuck
- Check the exact environment, credential expiry, assigned permissions and provider response. A saved credential is not evidence of a successful business workflow.
- Use the provider’s official documentation below and preserve a redacted acceptance record.
Provider documentation
Read Nora’s prepared narration
Link to this guideEmail intakeMicrosoft Graph support mailbox
Implemented; provider/device verification required
Required configuration fields: MICROSOFT_TENANT_ID, MICROSOFT_CLIENT_ID, MICROSOFT_CLIENT_SECRET, SUPPORT_MAILBOX_WEBHOOK_SECRET
Before you start
- A Microsoft 365 support mailbox and a dedicated Entra application.
- Application Mail.Read and Mail.Send permissions, admin consent and an Exchange application scope limited to the intended mailbox.
Steps
- Configure the support mailbox address and emergency alias in the mailbox setup screen.
- Save the tenant ID, application/client ID, client secret and webhook verification secret through protected configuration.
- Use a distinct application and mailbox for QA; do not send test requests through the production support mailbox.
- Run mailbox authorization verification and create the Graph notification subscription.
- Send an authorized synthetic email to the test mailbox, reply in the ticket and verify threading, attachments and delivery.
- Confirm subscription renewal, delta polling, duplicate suppression and failed-delivery reporting.
Verify it works
- The inbound email creates one ticket in the correct company.
- Replies return to the intended test user; untrusted reply senders cannot attach content to another company’s ticket.
If you get stuck
- Check the exact environment, credential expiry, assigned permissions and provider response. A saved credential is not evidence of a successful business workflow.
- Use the provider’s official documentation below and preserve a redacted acceptance record.
Provider documentation
Read Nora’s prepared narration
Link to this guideCommunicationsTwilio incident alerting
Implemented; provider/device verification required
Required configuration fields: TWILIO_ACCOUNT_SID, TWILIO_AUTH_TOKEN, TWILIO_FROM_NUMBER, EMERGENCY_ON_CALL_EMAIL, EMERGENCY_ON_CALL_PHONE
Before you start
- A Twilio account, capable sender, approved on-call recipient and any required messaging/voice registration.
Steps
- Configure account SID, auth token, sender number and the intended on-call contact in protected settings.
- Confirm the escalation policy and channel choice. A configured RingCentral SMS route must not silently fall back after an uncertain send.
- Use a test incident to verify SMS escalation, the P1 call flow, delivery results and acknowledgement stopping further escalation.
- Verify current on-call routing before enabling real incident notifications.
Verify it works
- Only the approved on-call recipient receives the test.
- Failed or uncertain provider sends are reported accurately.
If you get stuck
- Check the exact environment, credential expiry, assigned permissions and provider response. A saved credential is not evidence of a successful business workflow.
- Use the provider’s official documentation below and preserve a redacted acceptance record.
Provider documentation
Read Nora’s prepared narration
Link to this guideIdentity & SSOMicrosoft Entra ID SSO
Implemented; provider/device verification required
Required configuration fields: MICROSOFT_CLIENT_SECRET
Before you start
- A dedicated Entra app registration, verified tenant, client secret and approved staff/client account.
Steps
- For TLS production, register https://connect.techlaststop.com/auth/microsoft/callback as the web callback. Other domains need their own deployed callback configuration.
- Grant only the sign-in scopes used by the application; configure tenant restrictions and admin consent as required by your tenant.
- Configure MICROSOFT_SSO_TENANT_ID and the protected MICROSOFT_CLIENT_SECRET. Current client-ID and callback constants remain TLS-specific.
- Bind the approved account to the correct immutable tenant/object identity. Sign-in must not turn an unapproved identity into staff.
- Test approved login, wrong tenant, revoked binding, missing MFA, logout and session expiry.
Verify it works
- Unapproved users and wrong-tenant tokens are rejected.
- TLS staff still complete LastStop Verify; provider login does not bypass it.
If you get stuck
- Check the exact environment, credential expiry, assigned permissions and provider response. A saved credential is not evidence of a successful business workflow.
- Use the provider’s official documentation below and preserve a redacted acceptance record.
Provider documentation
Read Nora’s prepared narration
Link to this guideCommunicationsOutlook calendar and Microsoft Teams
Implemented; provider/device verification required
Required configuration fields: MICROSOFT_TENANT_ID, MICROSOFT_CLIENT_ID, MICROSOFT_CLIENT_SECRET
Before you start
- The scoped Graph mailbox integration, Calendars.ReadWrite application permission, admin consent and an Exchange/Teams-enabled organizer.
Steps
- Use the company’s dedicated support calendar and authorize only the mailbox/organizer needed for appointment scheduling.
- Complete Graph credential and scope verification.
- Create a test appointment with an approved test attendee and a Teams link.
- Reschedule, change attendees and cancel it; verify provider event state, emails and audit history.
- Confirm reminder timing and repeat delivery behavior without using real customer appointments.
Verify it works
- The actual Outlook event and Teams join URL exist.
- Cancellation is reflected in the provider calendar, not only the portal.
If you get stuck
- Check the exact environment, credential expiry, assigned permissions and provider response. A saved credential is not evidence of a successful business workflow.
- Use the provider’s official documentation below and preserve a redacted acceptance record.
Provider documentation
Read Nora’s prepared narration
Link to this guideIdentity & SSOLastStop Verify
Implemented; provider/device verification required
Required configuration fields: No external service secret is required.
Before you start
- An approved TLS staff account and a browser that supports WebCrypto and protected local key storage.
Steps
- Complete the primary login and open the LastStop Verify enrollment/approval screen.
- Use an already registered passkey or browser approval method first. A browser approval key belongs to its original browser profile; a newly opened browser may list the registration without holding its private key. Register a new method only through the approved enrollment flow when needed. Never reset existing methods as a routine sign-in repair.
- Test one-time challenge approval and rejection, replay prevention and sign-in without verification.
- Review registered devices and expiry. Revoke a lost browser and follow the protected replacement process.
Verify it works
- Staff APIs return verification required before successful approval.
- A revoked browser cannot approve a new session.
- This browser-key scheme must not be advertised as hardware-backed phishing-resistant WebAuthn without a separate assessment.
If you get stuck
- The September 12 user screenshot showed four active Verify registrations. An unfamiliar browser or a failed environment handoff does not establish that those registrations were reset.
- Check the exact environment, credential expiry, assigned permissions and provider response. A saved credential is not evidence of a successful business workflow.
- Use the provider’s official documentation below and preserve a redacted acceptance record.
Provider documentation
Read Nora’s prepared narration
Link to this guideIdentity & SSOOkta Workforce SSO
Configuration only — implementation required
Required configuration fields: OKTA_ORG_URL, OKTA_CLIENT_ID, OKTA_CLIENT_SECRET
Before you start
- An organization-owned vendor subscription and authorized vendor administrator.
Steps
- Review the vendor’s official API/SSO documentation and your subscription’s API entitlement.
- Prepare a dedicated test application or API identity and least-privilege credentials for this company.
- The current connector can store configuration/reference information but does not execute the advertised sync or login workflow. Do not enter production secrets until TLS provides an implemented acceptance build.
- For SSO, TLS must implement issuer validation, a real callback, PKCE/state/nonce, identity binding and role mapping. For data connectors, TLS must implement field mapping, pagination, sync checkpoints, idempotency, retries and revocation.
- After implementation, configure the fields below, run the vendor sandbox workflow and cross-company negative tests, then approve the exact production configuration.
Verify it works
- The actual requested vendor operation succeeds and can be read back.
- Removing a credential stops operations; no other company’s credentials or data are used.
If you get stuck
- Implementation required cannot be fixed by filling in more credentials. Treat this as a development dependency, not a failed connection.
Provider documentation
Read Nora’s prepared narration
Link to this guideIdentity & SSOOneLogin SSO
Configuration only — implementation required
Required configuration fields: ONELOGIN_REGION_URL, ONELOGIN_CLIENT_ID, ONELOGIN_CLIENT_SECRET
Before you start
- An organization-owned vendor subscription and authorized vendor administrator.
Steps
- Review the vendor’s official API/SSO documentation and your subscription’s API entitlement.
- Prepare a dedicated test application or API identity and least-privilege credentials for this company.
- The current connector can store configuration/reference information but does not execute the advertised sync or login workflow. Do not enter production secrets until TLS provides an implemented acceptance build.
- For SSO, TLS must implement issuer validation, a real callback, PKCE/state/nonce, identity binding and role mapping. For data connectors, TLS must implement field mapping, pagination, sync checkpoints, idempotency, retries and revocation.
- After implementation, configure the fields below, run the vendor sandbox workflow and cross-company negative tests, then approve the exact production configuration.
Verify it works
- The actual requested vendor operation succeeds and can be read back.
- Removing a credential stops operations; no other company’s credentials or data are used.
If you get stuck
- Implementation required cannot be fixed by filling in more credentials. Treat this as a development dependency, not a failed connection.
Provider documentation
Read Nora’s prepared narration
Link to this guideITSM / PSAServiceNow
Limited outbound ticket workflow
Required configuration fields: SERVICENOW_INSTANCE_URL, SERVICENOW_CLIENT_ID, SERVICENOW_CLIENT_SECRET
Before you start
- A ServiceNow instance that supports the configured OAuth client-credentials flow and a dedicated integration identity with incident read/create rights.
Steps
- Register the integration with the company’s ServiceNow administrator and scope its access to approved incident fields.
- Save the HTTPS instance URL, client ID and secret in protected configuration.
- Run the incident authorization check.
- Create one synthetic Connect ticket and invoke the supported outbound incident creation. Verify the external ID/number and retry behavior.
- Do not enable a two-way system-of-record migration based on this connector: comment, status, assignment and full lifecycle sync are not implemented.
Verify it works
- Read authorization and an actual outbound incident both pass in the provider test instance.
If you get stuck
- Check the exact environment, credential expiry, assigned permissions and provider response. A saved credential is not evidence of a successful business workflow.
- Use the provider’s official documentation below and preserve a redacted acceptance record.
Provider documentation
Read Nora’s prepared narration
Link to this guideITSM / PSAAutotask PSA
Limited outbound ticket workflow
Required configuration fields: AUTOTASK_API_URL, AUTOTASK_USERNAME, AUTOTASK_SECRET, AUTOTASK_INTEGRATION_CODE, AUTOTASK_COMPANY_ID, AUTOTASK_QUEUE_ID, AUTOTASK_STATUS_ID, AUTOTASK_PRIORITY_ID
Before you start
- An Autotask API-only integration identity and the company’s correct API zone URL.
- Integration code, API username/secret, company ID, queue ID, status ID and priority ID.
Steps
- Create a least-privilege API integration identity in Autotask. Resolve the API zone from Autotask documentation.
- Save all required values and mapping IDs; verify every numeric mapping belongs to the intended tenant.
- Run the Tickets entity-information check.
- Create a synthetic ticket through the supported outbound flow and compare the actual Autotask company, queue, status and priority.
- Full company/contact/time/contract synchronization is not implemented; do not advertise the connector as a completed two-way PSA sync.
Verify it works
- The returned external ticket ID exists in the intended company and queue.
If you get stuck
- Check the exact environment, credential expiry, assigned permissions and provider response. A saved credential is not evidence of a successful business workflow.
- Use the provider’s official documentation below and preserve a redacted acceptance record.
Provider documentation
Read Nora’s prepared narration
Link to this guideRMM & devicesDatto RMM
Configuration only — implementation required
Required configuration fields: DATTO_RMM_API_URL, DATTO_RMM_API_KEY, DATTO_RMM_API_SECRET
Before you start
- An organization-owned vendor subscription and authorized vendor administrator.
Steps
- Review the vendor’s official API/SSO documentation and your subscription’s API entitlement.
- Prepare a dedicated test application or API identity and least-privilege credentials for this company.
- The current connector can store configuration/reference information but does not execute the advertised sync or login workflow. Do not enter production secrets until TLS provides an implemented acceptance build.
- For SSO, TLS must implement issuer validation, a real callback, PKCE/state/nonce, identity binding and role mapping. For data connectors, TLS must implement field mapping, pagination, sync checkpoints, idempotency, retries and revocation.
- After implementation, configure the fields below, run the vendor sandbox workflow and cross-company negative tests, then approve the exact production configuration.
Verify it works
- The actual requested vendor operation succeeds and can be read back.
- Removing a credential stops operations; no other company’s credentials or data are used.
If you get stuck
- Implementation required cannot be fixed by filling in more credentials. Treat this as a development dependency, not a failed connection.
Provider documentation
Read Nora’s prepared narration
Link to this guideRMM & devicesKaseya VSA
Configuration only — implementation required
Required configuration fields: KASEYA_VSA_API_URL, KASEYA_VSA_CLIENT_ID, KASEYA_VSA_CLIENT_SECRET
Before you start
- An organization-owned vendor subscription and authorized vendor administrator.
Steps
- Review the vendor’s official API/SSO documentation and your subscription’s API entitlement.
- Prepare a dedicated test application or API identity and least-privilege credentials for this company.
- The current connector can store configuration/reference information but does not execute the advertised sync or login workflow. Do not enter production secrets until TLS provides an implemented acceptance build.
- For SSO, TLS must implement issuer validation, a real callback, PKCE/state/nonce, identity binding and role mapping. For data connectors, TLS must implement field mapping, pagination, sync checkpoints, idempotency, retries and revocation.
- After implementation, configure the fields below, run the vendor sandbox workflow and cross-company negative tests, then approve the exact production configuration.
Verify it works
- The actual requested vendor operation succeeds and can be read back.
- Removing a credential stops operations; no other company’s credentials or data are used.
If you get stuck
- Implementation required cannot be fixed by filling in more credentials. Treat this as a development dependency, not a failed connection.
Provider documentation
Read Nora’s prepared narration
Link to this guideDocumentation & passwordsIT Glue
Authorization check only — ingestion pending
Required configuration fields: ITGLUE_API_URL, ITGLUE_API_KEY
Before you start
- A dedicated, read-only organization-owned API identity with the vendor’s required permissions.
Steps
- Create an IT Glue API key with only the approved organization scope.
- Choose the correct region-specific HTTPS API base URL from IT Glue documentation.
- Save ITGLUE_API_URL and ITGLUE_API_KEY in protected configuration, then run the organization-list authorization check.
- Do not assume documents, passwords or configurations were imported: synchronization is not implemented. Keep credential data within its approved vault boundary.
Verify it works
- The provider read check succeeds with only the intended tenant’s records.
- The UI reports authorization-only status and does not claim completed synchronization.
If you get stuck
- A 403 usually needs a permission, license or administrator-consent correction. Do not grant broad write permissions to make a read-only check pass.
Provider documentation
Read Nora’s prepared narration
Link to this guideRMM & devicesMicrosoft Intune device read checks
Authorization check only — ingestion pending
The legacy Intune catalog entry checks device/security read access. Use the separate Microsoft Defender incident guide for the new company-scoped incident-to-ticket workflow.
Before you start
- A dedicated, read-only organization-owned API identity with the vendor’s required permissions.
Steps
- Register a dedicated Entra application for read-only device/security access.
- Grant DeviceManagementManagedDevices.Read.All, SecurityIncident.Read.All and SecurityAlert.Read.All application permissions with tenant administrator approval.
- Save the dedicated INTUNE_TENANT_ID, INTUNE_CLIENT_ID and INTUNE_CLIENT_SECRET in protected configuration.
- Run the managed-device read check. Automatic Intune device import remains unimplemented in this legacy entry. For Defender incidents, open Companies > company > Security and follow the Microsoft Defender incident connector article.
Verify it works
- The provider read check succeeds with only the intended tenant’s records.
- The UI reports authorization-only status and does not claim completed synchronization.
If you get stuck
- A 403 usually needs a permission, license or administrator-consent correction. Do not grant broad write permissions to make a read-only check pass.
Provider documentation
Read Nora’s prepared narration
Link to this guideFinanceQuickBooks Online
Configuration only — implementation required
Required configuration fields: QBO_CLIENT_ID, QBO_CLIENT_SECRET, QBO_REALM_ID, QBO_REFRESH_TOKEN
Before you start
- An organization-owned vendor subscription and authorized vendor administrator.
Steps
- Review the vendor’s official API/SSO documentation and your subscription’s API entitlement.
- Prepare a dedicated test application or API identity and least-privilege credentials for this company.
- The current connector can store configuration/reference information but does not execute the advertised sync or login workflow. Do not enter production secrets until TLS provides an implemented acceptance build.
- For SSO, TLS must implement issuer validation, a real callback, PKCE/state/nonce, identity binding and role mapping. For data connectors, TLS must implement field mapping, pagination, sync checkpoints, idempotency, retries and revocation.
- After implementation, configure the fields below, run the vendor sandbox workflow and cross-company negative tests, then approve the exact production configuration.
Verify it works
- The actual requested vendor operation succeeds and can be read back.
- Removing a credential stops operations; no other company’s credentials or data are used.
If you get stuck
- Implementation required cannot be fixed by filling in more credentials. Treat this as a development dependency, not a failed connection.
Provider documentation
Read Nora’s prepared narration
Link to this guideITSM / PSAConnectWise PSA
Configuration only — implementation required
Required configuration fields: CONNECTWISE_API_URL, CONNECTWISE_COMPANY_ID, CONNECTWISE_PUBLIC_KEY, CONNECTWISE_PRIVATE_KEY, CONNECTWISE_CLIENT_ID
Before you start
- An organization-owned vendor subscription and authorized vendor administrator.
Steps
- Review the vendor’s official API/SSO documentation and your subscription’s API entitlement.
- Prepare a dedicated test application or API identity and least-privilege credentials for this company.
- The current connector can store configuration/reference information but does not execute the advertised sync or login workflow. Do not enter production secrets until TLS provides an implemented acceptance build.
- For SSO, TLS must implement issuer validation, a real callback, PKCE/state/nonce, identity binding and role mapping. For data connectors, TLS must implement field mapping, pagination, sync checkpoints, idempotency, retries and revocation.
- After implementation, configure the fields below, run the vendor sandbox workflow and cross-company negative tests, then approve the exact production configuration.
Verify it works
- The actual requested vendor operation succeeds and can be read back.
- Removing a credential stops operations; no other company’s credentials or data are used.
If you get stuck
- Implementation required cannot be fixed by filling in more credentials. Treat this as a development dependency, not a failed connection.
Provider documentation
Read Nora’s prepared narration
Link to this guideITSM / PSAHaloPSA
Configuration only — implementation required
Required configuration fields: HALOPSA_API_URL, HALOPSA_TENANT, HALOPSA_CLIENT_ID, HALOPSA_CLIENT_SECRET
Before you start
- An organization-owned vendor subscription and authorized vendor administrator.
Steps
- Review the vendor’s official API/SSO documentation and your subscription’s API entitlement.
- Prepare a dedicated test application or API identity and least-privilege credentials for this company.
- The current connector can store configuration/reference information but does not execute the advertised sync or login workflow. Do not enter production secrets until TLS provides an implemented acceptance build.
- For SSO, TLS must implement issuer validation, a real callback, PKCE/state/nonce, identity binding and role mapping. For data connectors, TLS must implement field mapping, pagination, sync checkpoints, idempotency, retries and revocation.
- After implementation, configure the fields below, run the vendor sandbox workflow and cross-company negative tests, then approve the exact production configuration.
Verify it works
- The actual requested vendor operation succeeds and can be read back.
- Removing a credential stops operations; no other company’s credentials or data are used.
If you get stuck
- Implementation required cannot be fixed by filling in more credentials. Treat this as a development dependency, not a failed connection.
Provider documentation
Read Nora’s prepared narration
Link to this guideRMM & devicesNinjaOne
Configuration only — implementation required
Required configuration fields: NINJAONE_API_URL, NINJAONE_CLIENT_ID, NINJAONE_CLIENT_SECRET
Before you start
- An organization-owned vendor subscription and authorized vendor administrator.
Steps
- Review the vendor’s official API/SSO documentation and your subscription’s API entitlement.
- Prepare a dedicated test application or API identity and least-privilege credentials for this company.
- The current connector can store configuration/reference information but does not execute the advertised sync or login workflow. Do not enter production secrets until TLS provides an implemented acceptance build.
- For SSO, TLS must implement issuer validation, a real callback, PKCE/state/nonce, identity binding and role mapping. For data connectors, TLS must implement field mapping, pagination, sync checkpoints, idempotency, retries and revocation.
- After implementation, configure the fields below, run the vendor sandbox workflow and cross-company negative tests, then approve the exact production configuration.
Verify it works
- The actual requested vendor operation succeeds and can be read back.
- Removing a credential stops operations; no other company’s credentials or data are used.
If you get stuck
- Implementation required cannot be fixed by filling in more credentials. Treat this as a development dependency, not a failed connection.
Provider documentation
Read Nora’s prepared narration
Link to this guideKnowledgeKnowledge center: author, search and export
Implemented; company-scoped
Use the TLS-branded web knowledge center at /knowledge. TLS global guides are read-only to customers; each company separately governs its private articles.
Before you start
- A signed-in user. Only a TLS platform owner can create, revise, publish, archive or restore TLS global guides. A company Knowledge manager or authorized company administrator can edit only that company’s private knowledge.
Steps
- Open Knowledge center from Owner, Company or Setup guides. Search by title, summary or article text; filter by category and choose an article.
- Expand the reader for a larger view and collapse it when finished. Export an article or filtered set as a downloadable PDF. Filter to no more than 50 articles and 400,000 body characters per PDF.
- Choose New article in the company workspace only when your role includes company knowledge management. Enter title, category, summary, body and optional public HTTPS source. Save as Draft, publish after review or archive when superseded. These actions can never target a TLS global article.
- Use Version history to restore an earlier revision as a new draft. A concurrent edit cannot silently overwrite a newer version; refresh and reconcile the changes.
- Export a LastStop knowledge transfer JSON for portable articles. In the destination company workspace, import it. Imported articles become drafts; review and publish them. Users, credentials, source-company permissions and attachments are not transferred.
- Use Official web documentation to search supported vendor documentation. Without an owner-configured Brave Search key, the portal supplies direct vendor search links. With a key, it retrieves live results; Read opens an allowlisted page as plain text.
Verify it works
- A second company cannot retrieve private article text, history or PDF exports.
- Every company role, including Company owner and Knowledge manager, receives TLS global knowledge as read-only; only a TLS platform owner can change it.
- Archived shared guides stay hidden; PDF files include readable Unicode text and TLS branding.
If you get stuck
- Shared guides can only be edited by the TLS owner in the shared workspace.
- A site that blocks automated reading can be opened in its own browser tab; arbitrary private network targets are not supported.
Provider documentation
Read Nora’s prepared narration
Link to this guideKnowledgeCustomer requests and wishlist voting
Implemented; moderated publication
Collect improvements and count both individual votes and distinct requesting companies.
Before you start
- A signed-in company user; owner moderation for public roadmap entries.
Steps
- Open Company > Requests and describe the desired outcome, current obstacle and benefit. Requests start private to the requesting company and TLS.
- Vote or remove your vote. Repeated clicks do not create duplicate votes; each account has one vote per request.
- As TLS owner, review wording before publishing. Remove confidential company details; choose status and add a response.
- Merge genuine duplicates into one unmerged request. Votes are deduplicated and company demand is counted across the combined request. Merge cycles are rejected.
- Use company counts and customer interviews to prioritize the roadmap. A planned status is an intent, not a guaranteed delivery date.
Verify it works
- Another company cannot read a private request.
- One user cannot increase demand by voting repeatedly.
If you get stuck
- Requests already merged cannot be selected as a new destination. Open the surviving request.
Read Nora’s prepared narration
Link to this guideSecurity integrationsProofpoint TAP incidents and tickets
Implemented; provider credentials and acceptance required
Poll Proofpoint TAP SIEM threat email and malicious-link findings with a company-specific service principal.
Before you start
- Company administrator or TLS owner; a dedicated provider application for this company.
- A separate test tenant or approved test records and company responders who can verify results.
- Proofpoint TAP SIEM entitlement and generated service principal/secret.
Steps
- Open Companies > company > Security > Proofpoint TAP > Configure connection and routing.
- Enter the TAP service principal and secret in protected fields. Select minimum severity and Automatically create incident tickets.
- For email, first configure the company notification mailbox using the Security notifications guide; enter responder addresses and enable email routing.
- Save, then Verify read access. Verification reads a recent provider window without creating tickets or sending email. Correct credentials, permissions or entitlement errors before enabling.
- Choose Enable sync. The existing five-minute maintenance handler polls enabled connections using bounded time windows and overlap for recovery; each provider event ID is deduplicated.
- Use Sync now to test an approved finding. Inspect Security events and the linked ticket. Acknowledge or resolve the security event with notes; complete the ticket separately.
Verify it works
- A known provider finding creates exactly one company security event and one linked ticket when its severity qualifies.
- Repeat the same event and verify there is no duplicate ticket or responder notification.
- Pause the connection, verify no further polling, and check wrong-company API access is denied.
If you get stuck
- 401/403: check TAP principal/secret and licensed API access.
- A successful empty read verifies access, not incident delivery; use an approved known finding before acceptance.
Provider documentation
Read Nora’s prepared narration
Link to this guideSecurity integrationsMimecast SIEM incident intake
Implemented for API 1.0 MTA threat logs; acceptance required
Ingest explicit threat findings from Mimecast SIEM API 1.0; ordinary delivered email does not become an incident.
Before you start
- Company administrator or TLS owner; a dedicated provider application for this company.
- A separate test tenant or approved test records and company responders who can verify results.
- Mimecast API 1.0 application ID/key, access key and Base64 secret key with Get SIEM Logs permission.
Steps
- Confirm the account exposes SIEM API 1.0 Get SIEM Logs and identify its region. API 2.0 OAuth credentials are not interchangeable with these API 1.0 keys.
- Open Security > Mimecast and enter Application ID, Application key, Access key, Secret key and the correct US/EU/DE/CA/AU/ZA region.
- Choose minimum severity, incident creation and optional company responder email settings; save the protected configuration.
- Run Verify read access. The connector signs requests, requests uncompressed JSON MTA logs and supports JSON or newline-delimited JSON responses with the continuation token.
- Enable sync and process an approved test threat. The connector recognizes explicit virus, threat and impersonation indicators. Confirm your account's log fields against a real sample; every vendor log category is not mapped.
- Inspect the company event, ticket and delivery status. Pause before rotating credentials, save the replacement and verify again.
Verify it works
- A known provider finding creates exactly one company security event and one linked ticket when its severity qualifies.
- Repeat the same event and verify there is no duplicate ticket or responder notification.
- Pause the connection, verify no further polling, and check wrong-company API access is denied.
If you get stuck
- Check region and system clock for signature failures.
- If the account only offers API 2.0 or a different log schema, this adapter needs a scoped extension before it can be accepted.
Provider documentation
Read Nora’s prepared narration
Link to this guideSecurity integrationsMicrosoft Defender incidents to tickets
Implemented; Graph acceptance required
Read Microsoft Defender XDR incidents using Microsoft Graph and create company-scoped support incidents.
Before you start
- Company administrator or TLS owner; a dedicated provider application for this company.
- A separate test tenant or approved test records and company responders who can verify results.
- Defender entitlement and an Entra application with SecurityIncident.Read.All application permission and tenant admin consent.
Steps
- In the customer tenant, register a dedicated server application. Grant only SecurityIncident.Read.All for this incident-read workflow and record the secret expiry.
- In Company > Security > Microsoft Defender, save the tenant ID, client ID and secret. Choose minimum severity, ticket creation and approved recipients.
- Choose Verify read access. The adapter uses client credentials and Microsoft Graph v1.0 security/incidents with bounded paging; it does not isolate devices or change provider incidents.
- Enable sync and use Sync now for a known approved incident. Confirm provider incident ID, affected company, title, severity and linked ticket.
- Review credentials-compromise evidence and assign a responder. Remediation stays with authorized analysts in the provider; the connector does not infer theft from a device alert.
- Acknowledge and resolve in the Security workspace with a resolution note. Close the support ticket after remediation and verify subsequent provider updates do not create duplicates.
Verify it works
- A known provider finding creates exactly one company security event and one linked ticket when its severity qualifies.
- Repeat the same event and verify there is no duplicate ticket or responder notification.
- Pause the connection, verify no further polling, and check wrong-company API access is denied.
If you get stuck
- 403: confirm application permission, tenant consent and Defender entitlement.
- The legacy Intune entry is a separate read-check workflow; it does not replace this incident connector.
Provider documentation
Read Nora’s prepared narration
Link to this guideSecurity integrationsEntra credential and risky-sign-in findings
Implemented; Identity Protection entitlement required
Ingest Entra Identity Protection risk detections. Location flags supplement provider risk evidence; they do not by themselves prove compromise.
Before you start
- Company administrator or TLS owner; a dedicated provider application for this company.
- A separate test tenant or approved test records and company responders who can verify results.
- An eligible Entra ID P1/P2 license for the risk-detection data required and IdentityRiskEvent.Read.All application permission with admin consent.
Steps
- Create a dedicated Entra application in the customer tenant. Grant IdentityRiskEvent.Read.All application permission and the appropriate administrator consent.
- Open Company > Security > Microsoft Entra ID. Save tenant ID, client ID and secret. Select minimum severity and incident/email routing.
- Optionally enter two-letter country codes from the company's approved travel/access policy. A flagged country is investigation context and does not automatically become critical severity.
- Run Verify read access, then Enable sync. The connector reads Graph identityProtection/riskDetections and follows validated pagination.
- Test a known eligible leaked-credential or risky-sign-in detection. Check provider risk level, user, event type and country evidence against the resulting company ticket.
- Investigate with the customer before remediation. Conditional Access changes, password reset, session revocation and provider remediation are separate authorized operations.
Verify it works
- A known provider finding creates exactly one company security event and one linked ticket when its severity qualifies.
- Repeat the same event and verify there is no duplicate ticket or responder notification.
- Pause the connection, verify no further polling, and check wrong-company API access is denied.
If you get stuck
- No detections can mean no risk in the window, insufficient license detail or missing permissions; verify with the tenant administrator.
- Reported lost/stolen devices can be entered manually in Security; geography alone cannot prove theft.
Provider documentation
Read Nora’s prepared narration
Link to this guideSecurity and operationsSecurity findings tickets and email acceptance
Implemented; verification required
Review security findings, configure Microsoft or Google notifications and distinguish provider acceptance from delivered email.
Before you start
- An authorized administrator in the correct company or the TLS owner console, with mandatory verification completed.
- Use an approved synthetic account for acceptance. Keep credentials, personal data and recovery codes out of recordings.
Steps
- Choose the company Security section. TLS can manage security delivery for Managed IT; company Workspace security managers can manage their permitted configuration. The paid tier and selected services must include security operations.
- Authorize an implemented security collector for the customer’s provider and verify its returned tenant and device scope. Enable collection only after reviewing the permissions and evidence.
- Configure the company notification mailbox using Microsoft application credentials or Gmail OAuth/delegation. Verify the sender mailbox identity. Microsoft shared mailboxes require the appropriate application access; a Google Group is a recipient, not automatically a Gmail sending mailbox.
- Set the company security recipient. A licensed shared mailbox, approved distribution group or Google address can receive notices when its delivery and external-sender settings permit it. Confirm membership and avoid including unnecessary sensitive incident details.
- Enable ticket and email behavior for qualifying findings. Each finding keeps its company identity and delivery claim. Repeated collection updates the same event instead of creating an unlimited number of tickets.
- Review an authorized synthetic finding, its ticket and the email delivery entry. A provider-accepted send is not proof that every distribution-list member received it. Obtain approved recipient confirmation.
- Pause on unexpected recipients or provider failure. Explicit failures can retry under the delivery policy; an uncertain send requires review to avoid duplicates. Record incident resolution and verify recovery before closing the event.
Verify it works
- Cross-company findings and recipients remain isolated.
- A failed token request does not count as a sent email.
- Uncertain provider outcomes are not automatically resent.
If you get stuck
- Real provider consent, a scheduler invocation and approved inbox delivery are required. ManageEngine inventory alone is not a vulnerability feed.
Provider documentation
Read Nora’s prepared narration
Link to this guideService operationsTicket images and attachment boundaries
Implemented; new ticket videos rejected
Attach screenshots, photos and pictures to new or existing tickets. Historical files are preserved.
Before you start
- Access to the ticket; a supported image file.
Steps
- Choose Attach images on the ticket. JPEG, PNG, WebP, GIF and supported HEIC/HEIF images are accepted.
- Keep each file at or below 10 MB, with no more than 20 images or 40 MB in a submission. Inbound email intake keeps its separate 8 MB per-file limit.
- Video files and files disguised with an image MIME type are rejected using both declared type and file signatures.
- Open the uploaded image and verify it belongs to the intended ticket. Do not put passwords, recovery codes or API keys in screenshots.
- Historical media remains under existing access controls. Removing new video uploads does not delete past customer records.
Verify it works
- An MP4 and a text file renamed .png are rejected.
- A second company cannot read the attachment URL.
If you get stuck
- Convert unsupported camera formats to JPEG/PNG on your device. Browser display support for HEIC can differ even when the file is stored correctly.
Read Nora’s prepared narration
Link to this guideOperationsStorage, capacity and expansion
Recorded usage and planning budgets implemented; provider capacity requires verification
TLS owners monitor physical storage observations, company file usage, capacity evidence and costs. Customer roles cannot open these infrastructure controls.
Before you start
- Owner access and agreed retention/export policies.
Steps
- Open /admin/storage as a TLS owner. Use the Owner storage pools and cost controls guide for measured sources, allocations, 75%/90% alerts and expansion.
- Read the measurement source. Database observations report D1 size metadata. Object usage is published after a complete resumable R2 scan. Company file usage sums recorded ticket attachments and documents; it excludes database rows and untracked objects.
- Obtain the actual provider allocation and record its evidence. Enter bytes, the 75% warning and 90% critical levels, and the current record revision. Save. Never enter an invented provider limit to make a percentage appear.
- Enter a monthly cost budget, decimal-GB storage rate, known fixed costs, attributed monthly revenue and target margin. The estimate covers only the costs entered, not unconfigured egress, operations, backups or taxes.
- Use Refresh observations to collect without sending email. Inspect the timestamp, source, stale-data state and scheduler result. The automatic production maintenance handler evaluates alerts on its configured five-minute schedule.
- Use Expansion plans to record requested capacity, a cost ceiling, reason, provider reference and verification evidence. Complete the actual provider operation and backup/restore acceptance before closing the change.
- Pause obsolete external inventory or move it to Trash. Restore within 60 days. A retention hold pauses inventory purge. This lifecycle changes the portal record; it never deletes a real database or bucket.
Verify it works
- Company and Managed IT customer accounts receive no capacity dashboard or API access.
- At exactly 75% the component warns; at exactly 90% it is critical. Unknown allocation remains unverified.
- A quota or budget edit does not create a provider purchase or customer charge.
If you get stuck
- If usage is zero, compare database bytes with file metadata; they measure different things.
- A provider D1 database cannot be enlarged beyond its supported limit; capacity growth may require partitioning or migration.
- Missing native quota access remains an owner setup gate, not a green readiness state.
Provider documentation
Read Nora’s prepared narration
Link to this guideCompany setupManaged Support clients and Company Workspaces
Implemented; paid workspace access enforced
TLS keeps owner controls while licensed company administrators manage their own company.
Before you start
- TLS owner access and a clear product agreement for the customer.
Steps
- Choose Managed Support client for customers receiving TLS services with basic ticket, knowledge and own-device access. Their membership does not grant RMM or integration administration.
- Choose Company Workspace for a company licensing LastStop Connect. Confirm paid seats and activate the organization before customer administrators use its privileged tools.
- Manage the product type from the owner company controls. An unpaid workspace cannot use its advanced APIs. Pause active security connections before downgrading a workspace.
- Use the same company ID in the owner command center and company portal. Company secrets, events, assets and changes stay attached to that ID. TLS platform settings and cross-company administration remain owner-only.
Verify it works
- A basic support administrator receives access denied on privileged company APIs.
- An administrator from another company cannot substitute the organization ID.
If you get stuck
- A company record is not a separate deployment. Its branded domain requires the domain onboarding steps.
Read Nora’s prepared narration
Link to this guideIntegrationsOne company connector catalog in both portals
Shared setup implemented; capability varies by provider
All 43 entries appear in the owner company command center and the licensed company workspace with plan eligibility, search, filters and protected setup state.
Before you start
- An owner-selected company or paid company administrator; credentials issued for that company.
Steps
- Open Companies > company > Integrations, or Company > Integrations. Both views read the same company-scoped setup. Configure once; reopening the other view shows the same state.
- The seven implemented security, automation and CRM intake adapters use Security settings for authorization, scheduled intake, deduplicated events/tickets, notification routing, pause and audit. Verify provider access before enabling intake.
- The complete 43-provider catalog includes Microsoft 365/Graph/Entra/Defender/Sentinel/Intune/Teams, Google Workspace and Google Security Operations, Okta, OneLogin, Duo, 1Password Business, Proofpoint, Mimecast, CrowdStrike, SentinelOne, Splunk, AWS Security Hub, ServiceNow, Jira Service Management, Freshservice, Zendesk, Salesforce, HubSpot, Workato, Datadog, PagerDuty, Slack, RingCentral, Twilio, Autotask, ConnectWise, HaloPSA, Datto RMM, Kaseya VSA, NinjaOne, Jamf Pro, IT Glue, Veeam, QuickBooks, SMTP/webhooks and OpenAI support tooling.
- Catalog availability, protected credential storage and an operational adapter are separate states. The generic owner import can stage the listed required keys and marks the connector Ready to verify; it never labels an unverified or unimplemented adapter Connected. Provider credentials, tenant consent and acceptance tests remain required.
- Do not copy TLS credentials into a customer company. Save each company’s own credentials in the protected fields. Rotation updates that company only; secrets are not returned to the browser.
Verify it works
- A change saved from the owner view appears in the same company’s portal.
- Another company cannot retrieve the setting, secret or imported inventory.
If you get stuck
- Activation pending means implementation or owner configuration is still required. A catalog card is not proof of working synchronization.
Read Nora’s prepared narration
Link to this guideAutomation integrationsWorkato recipe inventory and stopped-recipe events
Read intake implemented; provider acceptance required
Import recipe inventory and create events for stopped recipes with explicit failure causes.
Before you start
- Workato API entitlement, a company API client token and its actual hosting region.
Steps
- Open Company > Security > Workato. Select the region matching the account and enter its API token.
- Configure severity, automatic tickets and the company notification mailbox as needed. Save, verify read access and enable sync.
- Sync reads paginated recipes while excluding recipe code. A stopped recipe with a recorded failure cause produces a stable automation event. Successful or manually stopped recipes are not all treated as incidents.
- Inspect inventory, event and linked ticket, then pause the connection to stop further polling.
Verify it works
- An approved known failed recipe appears once and maps to the correct company.
- Repeated polling does not duplicate the linked event.
If you get stuck
- This adapter does not start/stop recipes, run jobs or publish Workato changes.
- Confirm API entitlement, token scope and region when access is rejected.
Provider documentation
Read Nora’s prepared narration
Link to this guideCRM integrationsSalesforce case inventory and ticket intake
Read intake implemented; provider acceptance required
Import Salesforce Case records and create company events for open cases.
Before you start
- An approved Salesforce API integration with client credentials, an integration user and read access to required Case fields.
- The exact HTTPS Salesforce My Domain instance URL.
Steps
- Configure the Salesforce client-credentials application and integration user in the company’s org. Record its My Domain URL.
- Open Company > Security > Salesforce. Save the instance URL, client ID and protected client secret.
- Choose Verify read access, configure the minimum severity and routing, then enable sync. The adapter discovers a supported REST version and pages through modified cases.
- Review case inventory, the event and ticket. High-priority open cases map to high severity; other open cases map to medium. Closed cases remain inventory records.
Verify it works
- A known Case ID produces only one event for that company.
- Invalid instance hosts and redirected pagination links are rejected.
If you get stuck
- This is case intake, not two-way case synchronization. Closing a Connect ticket does not close a Salesforce case.
Provider documentation
Read Nora’s prepared narration
Link to this guideSecurity integrationsGoogle Workspace alerts and directory inventory
Read intake implemented; provider acceptance required
Import Alert Center findings and basic directory user inventory without granting portal roles.
Before you start
- A company Google Workspace administrator, service account and domain-wide delegation approval.
- Alert Center and Admin SDK APIs enabled for the project.
Steps
- In Google administration authorize the service account client ID for https://www.googleapis.com/auth/apps.alerts and https://www.googleapis.com/auth/admin.directory.user.readonly. Use a designated delegated administrator.
- Open Company > Security > Google Workspace. Save the service-account email, delegated administrator email and PKCS8 private key in protected fields.
- Verify read access, choose ticket/notification routing and enable intake. The app reads paginated alerts and user inventory. Imported users do not create accounts or assign application roles.
- Check a newly created approved alert, its severity, company event and ticket. Review the directory inventory and pause when testing ends.
Verify it works
- The test alert is associated only with its own company.
- The private key never appears in API read-back, exported inventory or logs.
If you get stuck
- The alert filter uses creation time with overlap; updates to older alerts outside that window are not a complete historical resynchronization.
- Check delegation scopes, API enablement and the delegated user’s permissions on 401/403.
Provider documentation
- developers.google.com — reference 1
- developers.google.com — reference 2
- developers.google.com — reference 3
Read Nora’s prepared narration
Link to this guideOperationsPlanned maintenance and customer reminders
Scheduling and reminders implemented; provider delivery verification required
Record a customer maintenance window, release evidence and reminders without deleting company data.
Before you start
- TLS owner, validated company timezone, accepted QA evidence, backup reference and rollback plan.
- A functioning TLS support mailbox and current company billing/user email addresses.
Steps
- Open Companies > company > Planned changes. Schedule at least 60 days ahead. Use a 5–240-minute window contained in 01:00–05:00 in the company timezone. Enter UTC start/end as labeled in the form.
- Record the exact source commit, artifact SHA-256, QA reference, backup reference and rollback steps. A plan does not execute a deployment or make a backup by itself.
- The system queues the announcement and reminders 30, 7 and 1 days, then 1 hour before the window. Customers can read their own schedule and in-app notices. Email activity distinguishes accepted, failed and uncertain results.
- Resolve failed/uncertain notices using provider evidence. Starting work requires the planned window and accepted due announcements. Publish the validated release through the owner workflow; record completion and a result note.
- Cancel or reschedule explicitly when readiness changes. Existing company data is retained by these plan actions. Test restoration and additive migrations separately; never treat a plan as a no-risk guarantee.
Verify it works
- A short-notice or daytime normal-maintenance window is rejected.
- A second company cannot read the first company’s plan; reminders do not duplicate on scheduler replay.
If you get stuck
- Provider accepted is not a delivery receipt. An uncertain timeout is not automatically resent.
- Urgent incident handling requires a separate incident process; do not backdate a normal plan to bypass notice rules.
Read Nora’s prepared narration
Link to this guideBillingChoose Standard, Professional or Enterprise
Implemented; live payment acceptance pending
Three workspace tiers, separate from Managed Support client access.
Before you start
- A company created as Company Workspace and an authorized billing contact.
Steps
- Open /pricing or Companies > company > Licenses & billing. Standard is $19/user/month, Professional $39 and Enterprise $69; ten users minimum.
- Standard allows one registered device per licensed user; Professional allows three. Enterprise has no plan cap on devices assigned to registered users. Existing assets are retained if an agreement changes; future additions enforce the current allowance.
- Professional includes security incident connectors and a limited clean Dev workspace. Enterprise includes all catalog eligibility. Locked integration cards show the required plan, and the server rejects direct calls to locked actions.
- Choose monthly or prepaid 12/24/36 months. Discounts are 8/12/15 percent. The full prepaid amount, not its monthly equivalent, is charged. Existing contracts require a reviewed plan-change quote.
- Provider licenses, SMS/AI usage, agent distribution and additional capacity are separate. Verify each connector and actual workflow before including it in a customer launch.
Verify it works
- An unpaid checkout grants no plan or seats.
- A Standard company cannot bypass a disabled connector using a direct API request.
- Existing Managed Support customers retain basic access and do not receive workspace administration.
If you get stuck
- A listed provider can still be configuration-only; tier eligibility does not implement or authorize the provider.
Provider documentation
Read Nora’s prepared narration
Link to this guideBillingRenewal grace, receipts and service recovery
Implemented with automated checks; actual provider and email acceptance required
Keep previously paid service during a bounded renewal grace period; suspend on expiry and restore after confirmed settlement.
Before you start
- A valid billing email and a paid plan with a recorded term.
- A configured support mailbox with provider-approved sender permission.
Steps
- Read /policies before accepting a new order. The account stores the selected plan, term, policy version, acting user and acceptance timestamp. Keep the signed order separately.
- After a canonical Stripe paid invoice, one receipt is queued for the company billing email. Duplicate webhooks do not duplicate receipts. Manually confirmed paid plan orders are also picked up by the notice scheduler.
- Fixed terms receive 90-, 30-, 14- and 7-day reminders. A late-starting schedule sends the currently applicable reminder without a backlog.
- A failed renewal for previously paid licenses enters 30-day grace measured from canonical invoice finalization. Duplicate, late or newer invoice events cannot restart the original deadline. Initial unpaid purchases and unpaid additions do not receive new access. Billing remains available and company records are retained after service suspension.
- Payment reminders are staged on days 0, 7, 14, 21, 27 and 29, followed by suspension at day 30. The current stage is queued without a backlog; billing contacts and active TLS owners receive the applicable renewal notice. The delivery worker suppresses obsolete notices after the billing condition changes. Provider acceptance and actual receipt must be verified separately.
- After canonical settlement of the original unpaid renewal and a valid paid current subscription, restore the previously licensed service and clear the incident. A newer paid adjustment alone cannot erase the unpaid renewal. A canceled or paused subscription remains suspended.
- Use Licenses & billing > Request nonrenewal. Give at least 30 days notice for fixed terms unless the signed agreement or law differs. The request records notice, not a confirmed Stripe cancellation. Complete cancellation in the hosted billing portal or obtain TLS confirmation.
- Review Receipts and contract notices. Accepted means the provider accepted the email; queued, failed or uncertain need review. Uncertain deliveries are not resent automatically.
Verify it works
- Repeat a paid event and confirm one receipt.
- An expired or nonrenewal request does not delete company history.
- Isolated Dev and QA keep external delivery disabled unless dedicated test services are explicitly enabled; never use customer recipient addresses for acceptance tests.
- At the exact day-30 deadline, service access fails closed even if scheduled maintenance is delayed.
- Two replays create one notice for the applicable stage; partial payment preserves the unpaid balance and never grants extra seats.
If you get stuck
- No delivery: verify billing email, Graph mailbox permission and the delivery error.
- The 30-day rule is a commercial order policy, not a universal HIPAA requirement.
Provider documentation
Read Nora’s prepared narration
Link to this guideOperationsService status and incident communications
Manual tracker implemented; independent monitoring pending
Provide visible service health and updates without promising an unverified restoration time.
Before you start
- TLS owner for global updates, or company administrator for company status.
Steps
- Open /status for the public TLS tracker, or Company Workspace > Service tracker for company-specific updates.
- Choose a service and state: gray unverified, green operational, yellow degraded or red outage. Write the observed impact and next action, then publish the update.
- Post progress and verified recovery as new updates. Concurrent changes require a refresh; earlier updates stay in history. Do not include confidential company information in global updates.
- During a recorded active incident, new ticket/email acknowledgements use a friendly known-issue response with the tracker link and TLS support signature. Existing ticket and mailbox routing remains in place.
- Configure an independent uptime provider and status site before promising complete-outage monitoring. This in-app tracker cannot stay available if the whole hosting platform is down.
- In RingCentral Admin, add a temporary outage greeting through the relevant call queue or IVR. Use: We are aware of a technical issue and are working to restore service. Our team is reviewing support requests and will share updates through LastStop Connect. No restoration time is confirmed. This release does not change telephone greetings automatically.
Verify it works
- A company cannot read or update another company tracker.
- Anonymous readers can see global updates but cannot publish them.
- A missing health check appears gray, not green.
If you get stuck
- No phone announcement: RingCentral call routing and voice greeting access must be configured separately.
Provider documentation
Read Nora’s prepared narration
Link to this guideProductivityOpen workspaces across multiple monitors
Implemented
Keep separate portal sections open without sharing their tab navigation state.
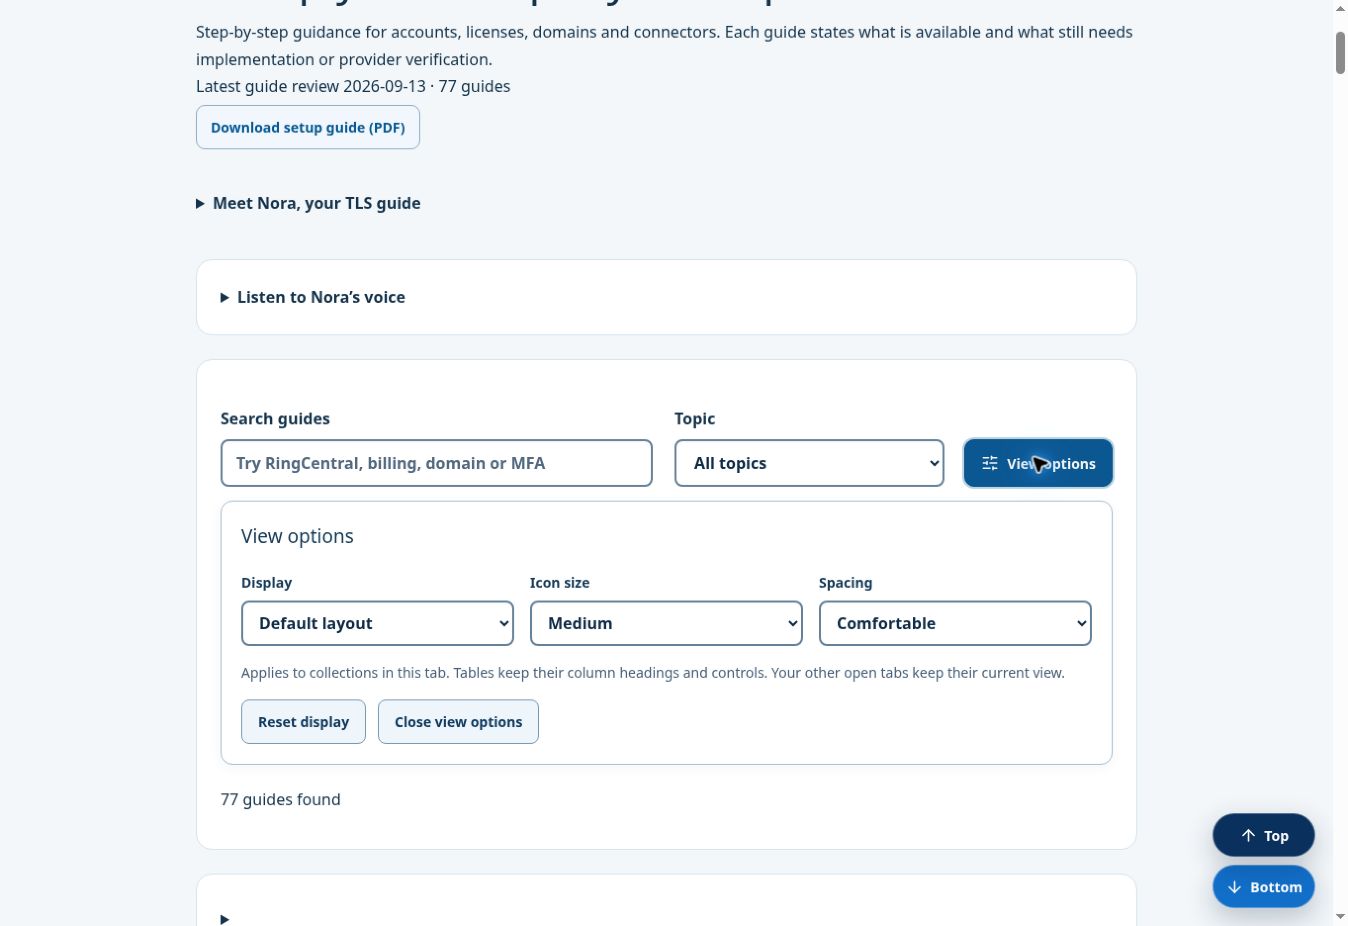
Before you start
- An authenticated user with access to the selected section.
Steps
- Open the desired area, such as ticketing, RMM, integrations, knowledge or password tools.
- Choose Open in new tab in the command center, support dashboard or Company Workspace. Company links retain the selected company and section.
- Drag the new browser tab to another monitor. Each tab keeps its own selected section. Refreshing one tab does not navigate the other tab.
- Choose View options in the page toolbar, beside the local heading or search controls, to select Details, List, Icons, or Titles and content, plus small, medium or large icons and comfortable or compact spacing. Preferences apply to collections in this tab; structured tables keep their column headings. Other already-open tabs retain their view.
- Save changes before switching context. Tabs still share server records and the same sign-in identity; refresh to see another tab’s saved changes. Signing out or revoking access still applies across sessions.
Verify it works
- Open Knowledge and Tickets in separate tabs; refresh the first and confirm the second remains on Tickets.
- Opening a deep link never grants permissions the user does not already have.
- Change View options in one tab and confirm the other open tab keeps its layout. Test narrow and wide windows; every action and status should remain readable.
- Click outside the View options panel or press Escape to close it.
If you get stuck
- Unsaved drafts are not automatically synchronized between tabs.
- A company user cannot use a TLS owner deep link to obtain backend access.
Read Nora’s prepared narration
Link to this guideCompany setupCompany logo and protected TLS co-branding
Implemented for Professional and Enterprise
Add a verified company logo without replacing Technology Last Stop platform identity, ownership or backend controls.
Before you start
- A Professional or Enterprise Company Workspace and the Company portal manage permission.
- An authorized square company logo. Do not upload a partner, vendor or customer logo without permission.
Steps
- Open Company > Portal settings > Company logo. Standard displays the upgrade boundary; Professional and Enterprise display the protected uploader.
- Prepare a 512 × 512 pixel square PNG or WebP with a transparent or white background. JPEG is also accepted. The allowed range is 256–2,048 pixels square and the maximum file size is 2 MB. SVG, scripts and video are rejected.
- Upload the file. The server verifies the declared type, binary signature, square dimensions, size and company scope before storing it in protected object storage.
- Review the workspace header, navigation, cards and mobile layout. The company logo appears as an additive tenant identity. The official TLS logo and Technology Last Stop platform label remain visible and cannot be replaced through company settings.
- Use Remove company logo to return to the TLS platform presentation. The change is revision checked and written to company Activity. The previous protected object is retained for recovery until lifecycle cleanup.
Verify it works
- A Standard workspace cannot upload a logo through either the screen or API.
- A user from another company cannot read or replace the logo.
- The company image never replaces the TLS platform mark, owner controls or permission boundary.
If you get stuck
- Image rejected: export a true square PNG, JPEG or WebP; changing a filename extension does not change the image format.
- Logo looks small: remove unused transparent padding around the artwork while keeping the canvas square.
Read Nora’s prepared narration
Link to this guideIdentity & SSOSign-in recovery without resetting Verify
Encrypted same-account handoff implemented; hosted acceptance required
Use existing Microsoft, Google or password access and existing MFA registrations.
Before you start
- Your original approved account and a registered verification method.
Steps
- Start at /login on your intended portal. Use the same provider and account you normally use.
- If LastStop Verify appears, primary sign-in has reached the verification step. Approve with the original passkey or registered browser. Do not remove active registrations to troubleshoot an environment redirect.
- For Dev/QA, start at its own URL. The trusted identity handoff redirects to Production for sign-in when needed and returns you automatically with a 60-second encrypted, one-use grant bound to that browser request. No password, Verify key or production session cookie is sent to the test environment.
- The test environment synchronizes the approved production staff profile at sign-in and creates its own session for no more than eight hours. Sign in again after a production profile or environment-grant change. New-client requests in Dev/QA route to the Production intake form instead of showing a failed isolated submission.
- If the handoff fails, record the visible ENV reference and time, then retry once from the environment link. Support can distinguish missing cookie, expired state, rejected/tampered grant, response and storage errors without requesting credentials.
Verify it works
- Your existing Verify methods remain registered.
- The correct role and company appear after sign-in.
- A rejected or expired handoff never bypasses MFA.
If you get stuck
- During a staged deployment, an older environment can still use the legacy back-channel. ENV-NETWORK identifies only that legacy path; the current encrypted grant does not require the environment server to call Production.
- Corporate browser policy, a new browser profile, provider access or a missing passkey can require a different recovery path.
Provider documentation
Read Nora’s prepared narration
Link to this guideOperationsSupport tiers and customer change templates
Implemented; staff assignments and release evidence require review
Keep escalation ownership clear and prepare customer changes without inventing release evidence.
Before you start
- TLS owner access for internal staff membership and platform change scheduling.
- Confirmed customer notification contacts and a tested release before scheduling.
Steps
- Open Administration > IAM > Support tiers. Read the ordered Tier 1 to Tier 7 directory. Expand responsibilities and membership to inspect the actual active staff.
- Use Manage staff membership to return to People and access. Review the staff member’s role, permissions and support tier before saving. Empty tiers do not gain invented assignments.
- In Companies, open the customer and Planned changes. Review the TLS customer-notice and rollback templates, replacing general scope wording with the actual change.
- Choose a UTC start that maps to 01:00–05:00 in the customer time zone and provides 60 days of notice. Check the expected duration.
- Enter the real tested commit, artifact SHA-256, QA reference and verified backup. Scheduling queues customer notices; it does not perform a deployment.
- Inspect Notice delivery activity and record each real release stage. Unknown or uncertain delivery must be investigated before resending.
Verify it works
- Tier membership matches approved active staff records.
- All company navigation buttons remain accessible without a horizontal tab scrollbar.
- No notice is sent merely by opening or editing a template.
If you get stuck
- A blank release evidence field must be filled from a real verification record, not example values.
- Customer profile updates preserve the registered domain, paid subscription and login identities.
Read Nora’s prepared narration
Link to this guideIntegrationsConnect Microsoft 365 and Google Workspace license intelligence
Implemented; each company supplies and approves its own read-only provider application
Display subscription products, reported capacity, assigned users and returned role indicators without changing a vendor license.
Before you start
- A LastStop Connect company Owner, Administrator or Billing administrator with Vendor licenses management permission.
- The protected integration vault and a dedicated provider application belonging to that company.
- Microsoft Graph application permissions LicenseAssignment.Read.All and User.Read.All with tenant administrator consent, or a Google delegated service account for Directory user read-only and License Manager access.
Steps
- Open Companies > company > Vendor licenses. The same tenant-scoped page is available to eligible customer roles in their company portal.
- For Microsoft 365, create a dedicated Entra application, add LicenseAssignment.Read.All and User.Read.All application permissions, grant administrator consent, and create a time-limited client secret. Paste the tenant ID, client ID and secret into the Microsoft 365 connection form. To include direct active directory roles and their allowed actions, also grant RoleManagement.Read.Directory and select Include direct active Entra directory roles. Group-derived, eligible PIM and application permissions are not part of this view.
- For Google Workspace, create a dedicated service account and enable domain-wide delegation. Authorize admin.directory.user.readonly and apps.licensing for the service account client ID. Enter the service-account email, delegated administrator email, private key and applicable License Manager product IDs. Google-Apps is the default starting product ID. Enter the actual Customer ID from Google Admin > Account > Account settings > Profile (for example C01234567). The licensing endpoint does not use my_customer. Google offers no read-only licensing scope; LastStop limits inventory calls to GET and never exposes license mutations.
- Save the protected credentials. Secrets are encrypted, never returned to the browser and replaced as a new revision when rotated.
- Run Sync now after provider consent. The source moves through its recorded lifecycle state. A successful read replaces the complete snapshot atomically; a failed provider call or failed database write preserves the previous snapshot.
- Search by user, email, product, SKU or returned permission. Product capacity depends on what the provider API returns; Google assignment feeds do not always include purchased capacity.
- To stop a source, choose Pause or move it to Trash. Restore returns it with synchronization paused. Choose Resume, then Sync now when ready. Resume does not contact the provider. Permanent deletion erases only the local encrypted credential and cached inventory.
Verify it works
- A user from another company receives access denied and cannot query this company ID.
- No API route or interface offers assign, unassign, purchase or cancel for an external vendor license.
- Provider secrets never appear in the response, activity detail or browser after saving.
- Product totals and assigned-user counts reconcile with the provider administration console for the same tenant and sync time.
- Pause or delete a connection during a sync: a late result must not overwrite the local lifecycle state. A failed database write must preserve the previous complete snapshot.
- A restored or paused connection has a visible Resume action. Resume alone must not send a provider request or modify a vendor account.
If you get stuck
- Microsoft 401 or 403: confirm the tenant ID, secret expiry, application—not delegated—permissions and completed administrator consent.
- Google 401 or 403: confirm domain-wide delegation, exact OAuth scopes, delegated administrator account and enabled Admin SDK and Enterprise License Manager APIs.
- A failed sync preserves the last complete snapshot. Rotate or correct credentials, then run Sync again; do not broaden permissions to include write access.
- For Okta, OneLogin, Salesforce, Adobe, Atlassian, Slack and Zoom, use the separate provider articles below. Their inventory scope differs; application assignments are not necessarily paid licenses.
Provider documentation
- learn.microsoft.com — reference 1
- learn.microsoft.com — reference 2
- developers.google.com — reference 3
- developers.google.com — reference 4
- learn.microsoft.com — reference 5
- developers.google.com — reference 6
Read Nora’s prepared narration
Link to this guideBillingChoose and bill Managed IT Support separately from Company Workspace
Plan model implemented; live charging remains behind Stripe acceptance and owner release gates
Managed Support is a staffed TLS service with its own Standard, Professional and Enterprise pricing, entitlements and contract terms.
Before you start
- An approved company record and confirmed scope of support.
- An authorized signer, billing contact and at least ten supported users.
- For online charging, the verified Stripe product/price catalog, restricted runtime key, signed webhook and successful test-mode acceptance.
Steps
- When creating a company, choose Managed IT Support — TLS-managed service. Do not choose Company Workspace unless the customer purchased the customer-administered platform.
- Choose Standard at $79, Professional at $129 or Enterprise at $199 per supported user/month. Use month to month, or prepaid 12/24/36-month terms with 8/12/15 percent discounts.
- Review included support coverage, device allowance, integration eligibility and any project or vendor costs. The signed service agreement controls when it differs from list pricing.
- Record the authorized signer and policy acceptance. A quote or saved company does not activate paid entitlement.
- Use Stripe-hosted Checkout for a new subscription after test acceptance, or record a cleared manual payment with its real receipt reference. Never grant seats from a browser return URL alone.
- Use the hosted Stripe customer portal for customer payment methods, invoices and permitted cancellation controls. TLS payout bank details remain an owner-only Stripe task and can be completed later.
- Send and retain payment receipts and 90-, 30-, 14- and 7-day fixed-term renewal notices. A nonrenewal request records notice but is not cancellation confirmation.
Verify it works
- Managed Support users do not receive Company Workspace RMM, connector or backend administration merely because they are clients.
- Company Workspace and Managed Support use distinct Stripe products and prices, even when plan names match.
- Failed, incomplete or duplicate payment events cannot add licenses twice or grant unpaid access.
If you get stuck
- An incomplete Managed Support catalog keeps online checkout unavailable; manual quoting remains available without changing entitlement.
- Do not enable automatic tax until applicable Stripe Tax settings and registrations are active and independently reviewed.
- Plan changes for an existing contract require a reviewed quote instead of silently replacing the current agreement.
Provider documentation
Read Nora’s prepared narration
Link to this guideIntegrationsRestore or permanently delete a company integration
Available to authorized integration and security administrators
Recover company connector settings from Trash or permanently erase the local connection without waiting.
Before you start
- Company integration management permission. Operational security providers also require security management permission.
Steps
- Open Company integrations and find the provider. Expand Move connection to Trash and confirm the action. The connection stops synchronizing.
- Open Trash below the integration catalog. Select Restore connection to bring it back with sync paused. Security providers require a fresh provider verification before enabling.
- To remove the local connection permanently, expand Delete permanently now, confirm the provider, then delete. Saved credential revisions and cached inventory for only that company and provider are erased.
- Historical incidents, tickets, audit records and the external vendor account remain. Permanent deletion cannot be undone.
Verify it works
- A different company cannot see or delete this connection.
- A trashed security provider cannot be verified, enabled or polled.
- Restoring never silently resumes external operations.
If you get stuck
- If a provider operation is finishing, refresh after it finishes and retry. This protects against an in-flight job recreating deleted data.
- If another administrator changed the connection, refresh to review the latest settings.
Read Nora’s prepared narration
Link to this guideSecurity and governanceReview an integration and update its policies
Operational review procedure
Keep permissions, data handling and setup instructions aligned when a provider or integration changes.
Before you start
- An accountable TLS or company administrator and the proposed change scope.
- The provider’s current security documentation and applicable agreements.
Steps
- Record the provider, intended purpose, company scope, API permissions, data categories and expected reads or writes. Identify whether healthcare information is involved.
- Check vendor processing locations, retention, export/deletion behavior, incident contacts and any required business associate agreement before approval. Do not activate unapproved processing of electronic protected health information.
- Use least privilege and an isolated test account. Test allowed actions, cross-company rejection, expired credentials, missing permissions and rollback. A successful login alone does not verify data synchronization.
- Update the matching KB article with exact prerequisites, setup steps, expected results and troubleshooting. Revise the affected operational policy and retain the previous approved version.
- Record the owner, approval date and evidence in the organization’s approved records system. Make instructions available to administrators who implement them; review again when the provider or data flow changes.
- Where HIPAA applies, configure retention of required documentation for six years from creation or last effective date, whichever is later. A portal article alone is not proof that retention or HIPAA obligations are satisfied.
Verify it works
- The documentation describes the actual adapter capability and permissions.
- Published global KB remains TLS controlled; company-private knowledge stays scoped to its company.
- For license and app-access feeds, document whether a count represents paid capacity, provider utilization, a profile, a billable indicator or an application assignment. Do not combine them into an unsupported claim of purchased licenses.
- For identity-derived access, record immutable identity linking, approved group roles, direct versus nested membership coverage, credential-change behavior, revocation, maximum stale-access duration and actual scheduler evidence.
If you get stuck
- Missing agreements or unknown data handling: keep the affected integration inactive until its assessment is complete.
Provider documentation
Read Nora’s prepared narration
Link to this guideKnowledgeNora narration and KB setup videos
Welcome video available; full lessons pending
Nora, your TLS guide, uses the approved Crisp standard female voice. Listen to the voice sample and use the maintained written setup guides. Full tutorial videos appear only after their narration, captions and content have been reviewed.
Before you start
- TLS approved Crisp standard on September 13, 2026. Nora remains the guide name. Crisp is the selected AI Doc Maker standard voice; its exact provider identity is retained with the approval record.
- A current setup article, authorized speech assets and a reviewed recording or guided-lesson workflow.
Steps
- Open /help/setup and expand Meet Nora, your TLS guide to play the owner-approved welcome video with captions, audio and a transcript.
- Use the approved Crisp female standard voice. The owner-supplied welcome recording is a complete introduction; a short preview of another script must never be presented as its full tutorial. Free standard access is selected; no paid voice upgrade is required by TLS.
- For a screen demonstration, use synthetic accounts and remove customer information, credentials, recovery codes, payment details and protected health information. A guided lesson must be clearly distinguished from a recording of an actual customer workflow.
- Align captions to the actual speech and retain the exact transcript. Verify technical terms, URLs, permission names, timing and the final rendered result. Do not publish a partial preview as a complete setup video.
- When reviewed media is available, choose Watch with Nora. Use the video controls, playback-speed selector, English captions and chapter navigation. Playback starts only when the viewer chooses it; chapter navigation seeks without starting audio automatically.
- Download video, audio or the transcript when available. These setup guides contain TLS-public instructions only. Company-private articles and recordings require a separately authorized publishing flow with the same company access boundary.
- Review media whenever the article or narration script changes. The portal withholds media whose article or transcript fingerprint no longer matches. Replace or withdraw outdated audio and video before making them available again.
Verify it works
- The selected voice is Crisp standard and narration is disclosed as AI-generated. The short sample confirms the voice selection only; it does not demonstrate a completed setup workflow.
- Caption wording, timing, article revision and chapter links match the reviewed media. The full setup remains readable without audio.
- Unsupported, stale or unapproved media does not create a playable button. The current written instructions remain accessible.
- No company-private information, credentials or protected health information was submitted to the public narration generator.
If you get stuck
- Media missing or outdated: use the written article. A transcript link does not mean a video has been produced.
- Playback failure: use the available download or transcript. Report the guide title, device, browser and a redacted error to TLS.
- A full tutorial appears only after its complete audio has been retrieved and reviewed. A provider preview or a generated-project link is not a published full lesson.
Provider documentation
Read Nora’s prepared narration
Link to this guideIntegrationsConnect Okta application access
Read adapter implemented; company authorization and successful live sync required
Read application assignments and directory identities without assuming paid downstream licenses.
Before you start
- An authorized company administrator with Vendor licenses management permission and an approved provider data-use scope.
- The company’s protected integration vault. Use a dedicated provider application; never put credentials in a KB, video, chat or source file.
Steps
- In the correct Okta organization, create a dedicated read-only administrator with access to the intended apps and user directory. Generate its API token and record its rotation owner. Okta tokens inherit the issuer’s permissions.
- Enter the organization URL and token in the Okta form. Supported organization hosts end in okta.com, okta-emea.com or oktapreview.com; arbitrary custom hosts and redirects are rejected.
- Optionally enter up to twenty immutable app IDs. With no selection, all returned apps are included only when there are twenty or fewer.
- Save the encrypted connection in Companies > company > Vendor licenses. Choose Sync now in production after provider authorization. Dev and QA isolate external operations. Review the recorded sync result and compare the snapshot with the provider console.
- Review each application’s assignments, direct or group origin when returned, and directory account status. Missing directory users remain explicitly unavailable; an app assignment does not prove downstream provisioning or purchased capacity.
Verify it works
- Compare an app assigned directly and an app assigned through a group. Their returned assignment origin must match Okta.
- Capacity and available seats remain unknown. Okta administrator permissions and downstream vendor licenses are outside this adapter.
- A successful company sync is required before describing the connection as healthy; an available adapter alone is not a connected account.
- Check a second company and a view-only account: neither can change this company’s credentials or lifecycle state.
- Pause, Resume and Trash affect only the local connection. Resume waits for a separate Sync action; no vendor user or license is modified.
If you get stuck
- 401 or 403: check credential expiry, the selected provider organization and the exact required permissions. Do not grant broad write access merely to bypass a failed read.
- A failed or incomplete provider response preserves the last complete snapshot. Review the error, correct the connection and explicitly retry.
- On a 429 rate-limit response, wait for the provider’s retry window before another manual sync. Large inventories can require a separately designed scheduled export; the current bounded sync does not commit partial results.
Provider documentation
Read Nora’s prepared narration
Link to this guideIntegrationsConnect OneLogin application and role access
Read adapter implemented; company authorization and successful live sync required
Read selected application assignments and returned role membership.
Before you start
- An authorized company administrator with Vendor licenses management permission and an approved provider data-use scope.
- The company’s protected integration vault. Use a dedicated provider application; never put credentials in a KB, video, chat or source file.
Steps
- Create a dedicated OneLogin API credential pair with Read All scope. Record the organization URL, client ID and client secret.
- Enter those values in the OneLogin form. Use the organization’s onelogin.com URL; the adapter exchanges the credential pair for a short-lived token during sync.
- Optionally select up to twenty numeric app IDs. The reader fetches users filtered to each selected app and the role memberships returned by the roles API.
- Save the encrypted connection in Companies > company > Vendor licenses. Choose Sync now in production after provider authorization. Dev and QA isolate external operations. Review the recorded sync result and compare the snapshot with the provider console.
- Review role names as application-access groups, not administrator privileges. OneLogin status and state are separate indicators; this reader does not infer purchased seats from either one.
Verify it works
- Compare selected-app users with the OneLogin app and role pages. Users from an unselected app must not be assigned to the selected product.
- A successful company sync is required before describing the connection as healthy; an available adapter alone is not a connected account.
- Check a second company and a view-only account: neither can change this company’s credentials or lifecycle state.
- Pause, Resume and Trash affect only the local connection. Resume waits for a separate Sync action; no vendor user or license is modified.
If you get stuck
- 401 or 403: check credential expiry, the selected provider organization and the exact required permissions. Do not grant broad write access merely to bypass a failed read.
- A failed or incomplete provider response preserves the last complete snapshot. Review the error, correct the connection and explicitly retry.
- On a 429 rate-limit response, wait for the provider’s retry window before another manual sync. Large inventories can require a separately designed scheduled export; the current bounded sync does not commit partial results.
Provider documentation
- developers.onelogin.com — reference 1
- developers.onelogin.com — reference 2
- developers.onelogin.com — reference 3
- developers.onelogin.com — reference 4
Read Nora’s prepared narration
Link to this guideIntegrationsConnect Salesforce license inventory
Read adapter implemented; company authorization and successful live sync required
Read provider license capacity, profile associations and direct permission-set names.
Before you start
- An authorized company administrator with Vendor licenses management permission and an approved provider data-use scope.
- The company’s protected integration vault. Use a dedicated provider application; never put credentials in a KB, video, chat or source file.
Steps
- Create a Salesforce OAuth application with client-credentials access and a dedicated integration user in the correct My Domain organization.
- Grant API Enabled and the minimum read access needed for UserLicense, User, Profile, PermissionSetAssignment and PermissionSet. Do not grant record modification for inventory.
- Enter the My Domain URL, client ID and client secret in the Salesforce form. The token’s returned instance must match the configured origin.
- Save the encrypted connection in Companies > company > Vendor licenses. Choose Sync now in production after provider authorization. Dev and QA isolate external operations. Review the recorded sync result and compare the snapshot with the provider console.
- Review TotalLicenses and UsedLicenses from Salesforce. Inactive users can retain a profile association without consuming a license, so their profile references are not added to provider utilization.
- Inspect returned profile and direct permission-set names. Permission-set groups, muting, record sharing and the complete effective-permissions graph are not calculated.
Verify it works
- Compare UsedLicenses with Salesforce and inspect an inactive user. An inactive profile reference must not inflate capacity or occupied-seat totals.
- A successful company sync is required before describing the connection as healthy; an available adapter alone is not a connected account.
- Check a second company and a view-only account: neither can change this company’s credentials or lifecycle state.
- Pause, Resume and Trash affect only the local connection. Resume waits for a separate Sync action; no vendor user or license is modified.
If you get stuck
- 401 or 403: check credential expiry, the selected provider organization and the exact required permissions. Do not grant broad write access merely to bypass a failed read.
- A failed or incomplete provider response preserves the last complete snapshot. Review the error, correct the connection and explicitly retry.
- On a 429 rate-limit response, wait for the provider’s retry window before another manual sync. Large inventories can require a separately designed scheduled export; the current bounded sync does not commit partial results.
Provider documentation
- developer.salesforce.com — reference 1
- developer.salesforce.com — reference 2
- help.salesforce.com — reference 3
Read Nora’s prepared narration
Link to this guideIntegrationsConnect Adobe product profile inventory
Read adapter implemented; company authorization and successful live sync required
Read product profiles and returned membership while keeping resource quotas separate from purchased seats.
Before you start
- An authorized company administrator with Vendor licenses management permission and an approved provider data-use scope.
- The company’s protected integration vault. Use a dedicated provider application; never put credentials in a KB, video, chat or source file.
Steps
- In Adobe Developer Console, create an OAuth Server-to-Server User Management API integration for the company organization. A system administrator must authorize its setup.
- Use the User Management scopes openid, AdobeID and user_management_sdk. Enter the organization ID ending @AdobeOrg, client ID and client secret in Connect.
- Save the encrypted connection in Companies > company > Vendor licenses. Choose Sync now in production after provider authorization. Dev and QA isolate external operations. Review the recorded sync result and compare the snapshot with the provider console.
- Review the product profiles and the active organization users returned by UMAPI. Administrative indicators come from documented group types, not guessed group-name prefixes.
- Open Inventory scope for the returned profile quota. A quota may describe a resource allowance and profile memberships can overlap; Connect therefore leaves purchased capacity and spare seats unknown.
- The reader limits each groups/users collection to five pages per sync to stay bounded. If more pages are required, arrange a scheduled export integration before claiming a complete larger inventory.
Verify it works
- An unknown Adobe identity type stays unknown. Duplicate profile names fail the join rather than assigning users to an ambiguous product.
- A successful company sync is required before describing the connection as healthy; an available adapter alone is not a connected account.
- Check a second company and a view-only account: neither can change this company’s credentials or lifecycle state.
- Pause, Resume and Trash affect only the local connection. Resume waits for a separate Sync action; no vendor user or license is modified.
If you get stuck
- 401 or 403: check credential expiry, the selected provider organization and the exact required permissions. Do not grant broad write access merely to bypass a failed read.
- A failed or incomplete provider response preserves the last complete snapshot. Review the error, correct the connection and explicitly retry.
- On a 429 rate-limit response, wait for the provider’s retry window before another manual sync. Large inventories can require a separately designed scheduled export; the current bounded sync does not commit partial results.
Provider documentation
- adobe-apiplatform.github.io — reference 1
- adobe-apiplatform.github.io — reference 2
- adobe-apiplatform.github.io — reference 3
Read Nora’s prepared narration
Link to this guideIntegrationsConnect Atlassian managed-account product access
Read adapter implemented; company authorization and successful live sync required
Read managed-account access without implying coverage of every external or unmanaged user.
Before you start
- An authorized company administrator with Vendor licenses management permission and an approved provider data-use scope.
- The company’s protected integration vault. Use a dedicated provider application; never put credentials in a KB, video, chat or source file.
Steps
- In Atlassian Administration, create a dedicated organization API key authorized for read:accounts:admin and record the correct organization ID.
- Enter the Atlassian organization ID and protected API key in its provider form. This vendor ID is separate from the LastStop Connect company ID.
- Save the encrypted connection in Companies > company > Vendor licenses. Choose Sync now in production after provider authorization. Dev and QA isolate external operations. Review the recorded sync result and compare the snapshot with the provider console.
- Review each managed account’s returned product access and status. Product records distinguish sites, so Jira access on two sites remains separate.
- Reconcile against the managed-account view in Atlassian. This GET endpoint does not cover every unmanaged or external user, purchased-seat total, project role or resource permission.
Verify it works
- A pagination link for a different organization is rejected. Capacity stays unknown when only account access is returned.
- A successful company sync is required before describing the connection as healthy; an available adapter alone is not a connected account.
- Check a second company and a view-only account: neither can change this company’s credentials or lifecycle state.
- Pause, Resume and Trash affect only the local connection. Resume waits for a separate Sync action; no vendor user or license is modified.
If you get stuck
- 401 or 403: check credential expiry, the selected provider organization and the exact required permissions. Do not grant broad write access merely to bypass a failed read.
- A failed or incomplete provider response preserves the last complete snapshot. Review the error, correct the connection and explicitly retry.
- On a 429 rate-limit response, wait for the provider’s retry window before another manual sync. Large inventories can require a separately designed scheduled export; the current bounded sync does not commit partial results.
Provider documentation
Read Nora’s prepared narration
Link to this guideIntegrationsConnect Slack membership and billable indicators
Read adapter implemented; company authorization and successful live sync required
Read workspace role flags and periodic billing eligibility without reading conversations.
Before you start
- An authorized company administrator with Vendor licenses management permission and an approved provider data-use scope.
- The company’s protected integration vault. Use a dedicated provider application; never put credentials in a KB, video, chat or source file.
Steps
- Use an approved workspace user token with admin, users:read and users:read.email. The admin scope also permits other Slack operations; restrict the application and its operators accordingly.
- Enter the expected workspace ID beginning T and the protected xoxp user token. The token must identify that exact workspace; an organization-wide token is not accepted by this setup.
- Save the encrypted connection in Companies > company > Vendor licenses. Choose Sync now in production after provider authorization. Dev and QA isolate external operations. Review the recorded sync result and compare the snapshot with the provider console.
- Review billable and non-billable member cohorts separately. Slack computes billing eligibility periodically, so it may lag recent activity. It is not a purchased-seat count.
- Inspect returned owner, administrator and guest flags. The reader does not request conversation messages, channel history or a full effective-permissions assessment.
Verify it works
- Test a deactivated or non-billable member and compare with Slack’s current billing view. It must not be labeled as an active billable seat.
- A successful company sync is required before describing the connection as healthy; an available adapter alone is not a connected account.
- Check a second company and a view-only account: neither can change this company’s credentials or lifecycle state.
- Pause, Resume and Trash affect only the local connection. Resume waits for a separate Sync action; no vendor user or license is modified.
If you get stuck
- 401 or 403: check credential expiry, the selected provider organization and the exact required permissions. Do not grant broad write access merely to bypass a failed read.
- A failed or incomplete provider response preserves the last complete snapshot. Review the error, correct the connection and explicitly retry.
- On a 429 rate-limit response, wait for the provider’s retry window before another manual sync. Large inventories can require a separately designed scheduled export; the current bounded sync does not commit partial results.
Provider documentation
Read Nora’s prepared narration
Link to this guideIntegrationsConnect Zoom user-type inventory
Read adapter implemented; company authorization and successful live sync required
Read the user types returned for active, inactive and pending Zoom accounts.
Before you start
- An authorized company administrator with Vendor licenses management permission and an approved provider data-use scope.
- The company’s protected integration vault. Use a dedicated provider application; never put credentials in a KB, video, chat or source file.
Steps
- Create and activate a dedicated Server-to-Server OAuth application in the company Zoom account. Grant user:read:list_users:admin.
- Enter the account ID, client ID and client secret in the Zoom form. Connect exchanges these credentials for an account token during synchronization.
- Save the encrypted connection in Companies > company > Vendor licenses. Choose Sync now in production after provider authorization. Dev and QA isolate external operations. Review the recorded sync result and compare the snapshot with the provider console.
- Review Basic, Licensed and any other user types returned by Zoom. Account state is shown separately from the user type; pending or inactive users are not silently relabeled active.
- Purchased capacity and unreturned add-on licenses remain unknown. A missing administrator role is explicitly marked unavailable instead of guessed.
- If a user moves between status lists during collection, the reader rejects that changing snapshot. Retry after the provider state settles.
Verify it works
- Compare user types and account states with Zoom. Confirm no user update, license assignment or meeting operation was requested.
- A successful company sync is required before describing the connection as healthy; an available adapter alone is not a connected account.
- Check a second company and a view-only account: neither can change this company’s credentials or lifecycle state.
- Pause, Resume and Trash affect only the local connection. Resume waits for a separate Sync action; no vendor user or license is modified.
If you get stuck
- 401 or 403: check credential expiry, the selected provider organization and the exact required permissions. Do not grant broad write access merely to bypass a failed read.
- A failed or incomplete provider response preserves the last complete snapshot. Review the error, correct the connection and explicitly retry.
- On a 429 rate-limit response, wait for the provider’s retry window before another manual sync. Large inventories can require a separately designed scheduled export; the current bounded sync does not commit partial results.
Provider documentation
Read Nora’s prepared narration
Link to this guideAccounts and accessSet up your company authenticator and recover access
Implemented; real customer enrollment acceptance required
A separate authenticator flow enforces a second factor for company owners, administrators, billing users and regular clients. Existing TLS staff Verify registrations remain separate.
Before you start
- An approved company account, a fresh primary sign-in and an authenticator app.
- A protected TLS encryption key. Never send an authenticator key, current code or recovery code in a ticket.
Steps
- Sign in with your existing approved Microsoft, Google or email account. Company accounts are directed to the authenticator page before protected portal access.
- Choose Set up authenticator. Scan the QR code from your authenticator app, or expand Enter the key manually. The QR is created locally in your browser; no external QR service receives the key.
- Enter the current six-digit code. First-time setup expires after ten minutes and belongs to the browser session that started it.
- Save the eight recovery codes shown after successful enrollment. Each works once. Store them securely, separately from your phone, and select I have saved my recovery codes securely.
- Continue to the workspace. On later sign-ins, enter a current authenticator code or one unused recovery code. A code already used by another sign-in cannot be replayed.
- For a lost phone and no remaining recovery code, contact TLS. A verified TLS owner opens Companies > Users > Recovery and sessions > Recover company authenticator, completes identity review and records the recovery case.
- After recovery, all of that user’s sessions and recovery codes are revoked. The user signs in again and enrolls a new authenticator. This does not reset a TLS staff Verify device.
Verify it works
- A company owner, billing administrator and ordinary client cannot read protected company APIs before MFA.
- Complete enrollment with a real authenticator on each supported browser; confirm recovery codes work exactly once.
- A second company cannot reset, inspect or verify the first company’s authenticator.
If you get stuck
- Too many attempts: wait 15 minutes. Starting setup again cannot clear the account’s attempt limit.
- Code mismatch: use automatic time on the phone and wait for a new code.
- Setup expired or used another tab: start again from a fresh sign-in; setup secrets are never returned from the status endpoint.
- Recovery requires an identity-verified TLS owner. Primary sign-in alone cannot overwrite an existing authenticator.
Provider documentation
Read Nora’s prepared narration
Link to this guideSecurity and credentialsManage company passwords with scoped permissions
Implemented shared company vault; customer acceptance required
Company Workspace customers have a separate shared credential vault with encrypted values, on-demand reveal, change history, collision protection and reversible Trash. This is separate from TLS staff vaults.
Before you start
- An active paid Company Workspace or a TLS owner preparing its configuration. Managed Support accounts do not receive workspace vault administration.
- Company password view permission to reveal; company password manage permission to create, edit or move records. Company owners and administrators have these permissions. Other roles need an explicit scoped delegation.
- A protected platform vault key and completed company MFA.
Steps
- Open Company Workspace > Passwords. Use Search credential titles and View options to choose a collection layout. The main listing never includes plaintext passwords.
- Choose Add credential. Enter the title, username, password, website, optional tags, rotation date and notes, then save. Password spaces are preserved exactly.
- Choose View credential to reveal a permitted item. The reveal is recorded in company activity. Copy only into a trusted destination. Read views clear after 60 seconds or when hidden.
- Choose Edit credential, make changes and save. If another tab changed the record, refresh and review the latest version; a stale edit cannot overwrite it. Save drafts before refreshing or closing.
- To remove an active credential, expand Move to Trash, confirm the specific removal and submit. Trashed credentials cannot be revealed. Open Trash to restore.
- Open this company section in another tab for an additional monitor. It retains the selected company and section; permissions are checked again on every server action.
Verify it works
- Inspect a saved database record during an authorized synthetic test: password values must be ciphertext, with secrets absent from audit entries.
- A regular company user without password permission, a Managed Support account and a different company cannot open or reveal the vault.
- Edit the same record in two tabs and confirm that the second stale save is rejected.
If you get stuck
- Unavailable encryption: TLS must restore the protected vault key before the vault is usable. Never replace an existing key without an approved migration.
- A company vault currently provides shared credentials. Personal customer vaults, native browser autofill, password-health scanning and full 1Password feature parity are not implemented.
- Company vault Trash has no automatic permanent purge in this release. Retention and any export or purge require the approved lifecycle process.
- Do not store primary-account MFA recovery secrets in the same account that they recover.
Read Nora’s prepared narration
Link to this guideOperationsCapture and restore a company test configuration
Configuration transfer and recovery implemented; hosting allocation and customer acceptance required
Capture supported settings, send an encrypted operation to a separately provisioned company Dev or QA target, read back its receipt, and restore the previous configuration if necessary. This is not a full production clone.
Before you start
- An active paid Company Workspace and a verified administrator with environment-management permission. TLS owner verification is required to register a hosting target or record a received payment.
- A separate company deployment using the reviewed application release, its own database and object bucket, a unique vault key and the intended private hosting audience. Never reuse the shared TLS Development or QA projects.
- Professional includes limited clean Dev for five test users; Enterprise includes ten. Separately purchased QA or Dev requires an actual received-payment record with an expiry. Recording that receipt does not create a charge.
Steps
- Open Licenses & billing > Company environments and request the intended Development or QA hostname. Under Configuration replicas & recovery, choose the same requested environment. The request alone does not allocate infrastructure.
- TLS provisions the separate hosting project, database and bucket, publishes the exact reviewed code and applies its additive migrations. Record the project ID, actual published source commit and infrastructure binding identities in the protected acceptance record. Unattended hosting allocation is not implemented.
- In that target’s protected runtime settings, set CONNECT_ENVIRONMENT to development or qa, CONNECT_REPLICA_TARGET_ID to the source environment record ID, CONNECT_REPLICA_ORGANIZATION_ID to the exact company ID, and CONNECT_REPLICA_SOURCE_COMMIT to the verified 40-character deployed source commit. Generate a unique 32-byte random import key as 64 lowercase hexadecimal characters for CONNECT_REPLICA_IMPORT_KEY. Set a distinct INTEGRATION_VAULT_KEY. Never put keys in chat, source or a tutorial.
- The TLS owner opens Register an isolated target in production. Enter the target native HTTPS URL, hosting project ID, deployed source commit and import key. Enter the authorized private hosting connection token if the target requires one. Verify and save target performs an encrypted identity probe and rejects the shared TLS targets, another company or a reused production vault key. Database and bucket IDs still need independent review.
- Review target scope and confirm replacement of the supported test configuration. Choose Capture and queue configuration. QA includes portal title, welcome text, time zone and accent; connector definitions arrive disabled. User roles, groups and delegations are retained only as anonymous test fixtures. They do not create accounts, sign-in federation or access grants. Clean Dev starts with default text and no production connector or permission fixtures.
- Choose Run now, or allow a separately verified hosting schedule to process queued jobs. Status progresses through queued, transferring, verifying and validated. The immutable encrypted operation has a two-hour execution window and at most three attempts. Two hours is an expiry limit, not a guaranteed build time. Only one active operation is allowed per environment.
- A validated job means its target returned the matching operation digest, current job ID and revision. It does not mark the whole environment ready. Complete isolated identity, custom DNS/HTTPS, real workflow, capacity and external-action acceptance separately. Registered replica targets always suppress production external actions, even if the general test override is enabled.
- If a transfer fails or its response is lost, inspect the status, then Retry the same operation while it remains eligible. The exact operation reference is retained and an already applied operation is not applied again. After expiry, a changed target connection or three attempts, inspect the actual target before capturing a replacement.
- To undo the current import, open Roll back the latest import, confirm the selected test target and queue the rollback. Run and verify it. The encrypted before-image restores the replicated settings and connectors. It does not restore customer content, a hosting deployment, user accounts, MFA or passwords; those records are outside the transfer.
Verify it works
- Verify distinct database and bucket binding IDs, keys and the intended audience; record these independently of the target probe.
- Keep a redacted company/environment/source/operation receipt. Exercise failed transfers, lost responses, retries and rollback with synthetic records.
- Confirm authentication factors, recovery codes and vault entries remain unchanged. Production data is not mutated. A concurrent target settings change must reject the import instead of silently overwriting that edit.
- The current schema supports up to 1,000 anonymous identities, 100 groups, 100 connector definitions and 2,000 delegations, within a 750 KB configuration payload. Larger captures fail; they are not truncated or described as complete.
If you get stuck
- Target setup required: complete isolated hosting and protected keys before queuing an operation.
- HTTP 401/403 or unreachable target: verify the approved private hosting token, import key and native URL in protected configuration. Do not make the site public to bypass an authentication failure.
- Another active job or changed target: wait for completion, retry an eligible failed job, or review the target after expiry before registering a new connection. Target rotation is blocked while a job is active.
- Incomplete replica scope: tickets, files, knowledge bodies, device agents, provider secrets, identity links, payment data, MFA, passwords and logo bytes are excluded. Names and emails in structured identity fields are removed; administrators must still review free-text portal and group settings for sensitive content.
- Recovery artifacts are retained until authorized infrastructure cleanup under the agreed retention policy. Keep encryption keys while retained backups are needed; automatic artifact deletion is not implemented.
Provider documentation
Read Nora’s prepared narration
Link to this guideOperationsVerify scheduled maintenance actually runs
Invocation recording implemented; production schedule evidence must be observed
Distinguish a manual operation, an installed handler, a recorded hosting invocation and confirmed provider delivery.
Before you start
- A verified TLS owner and a hosting schedule configured for the production worker.
- The current additive scheduler_runs migration and access to the owner company environment panel.
Steps
- Open a company’s Licenses & billing > Configuration replicas & recovery > Hosting scheduler evidence. This owner-only view shows up to five observed invocation start times, completion times and results.
- Wait for a hosting-generated invocation. The scheduled handler records its start, runs the existing maintenance tasks plus configuration replica processing, then records completed or partial failure. Manual Run now does not create a hosting invocation record.
- Review partial failures using protected operational records. One failed maintenance task does not stop the other tasks. The summary stores task names and outcomes, without provider secrets or response bodies.
- Check the actual intended result separately: a group snapshot progressed, an operation received its matching receipt, or an approved recipient received a renewal notice. A completed handler is not proof that an external message was delivered.
- Recheck after a hosting or runtime change. Invocation summaries are retained for 14 days and cleaned during successful maintenance. Keep required audit evidence in the approved records system before the local observation window expires.
Verify it works
- An actual hosting invocation has a recorded start and finish. An empty view explicitly says no invocation has been recorded.
- Dev, QA and registered company replica targets do not run production maintenance.
- Independently hosted monitoring must detect missing heartbeats and outages; the portal cannot prove its own availability during a host failure.
If you get stuck
- No recorded invocation: verify the production hosting schedule and deployment configuration. Do not label reminders or automatic processing operational based solely on source code.
- A running record without a finish may indicate interruption or runtime failure. Review hosting logs and each idempotent task’s state before retrying.
- Provider delivery failures still require the correct customer consent, credentials and approved recipient. Scheduler evidence does not replace that setup.
Provider documentation
Read Nora’s prepared narration
Link to this guideGetting startedFind your portal and pricing
Available
Choose the right product and find its pricing, licensing and policies without mixing software and managed services.
Before you start
- An approved account for protected customer tools. Public pricing needs no sign-in.
Steps
- Open https://connect.techlaststop.com/portals. Read the two product descriptions.
- Choose Managed IT when TLS manages your IT service. Sign in at /managed-it, complete MFA, then open support tickets, appointments or your permitted device information.
- Choose Company Workspace at /company when your team administers its own workspace. Your account selects your company automatically.
- Open /pricing#managed-it or /pricing#company-workspace for separate tier comparisons. Monthly and prepaid terms are labeled separately.
- Authorized billing users open /company?tab=billing for their own plan, named users, agreement and payment setup. A public price is not an active subscription.
- TLS platform owners use /companies?product=support_client for managed clients and /companies?product=workspace_tenant for workspaces.
- Open View options in the page toolbar. Choose the collection layout, icon size and spacing. Close the panel to regain space; it does not overlay the page.
Verify it works
- The displayed product and organization are correct.
- Refresh one tab and confirm a second tab keeps its selected view.
If you get stuck
- If access is unavailable, verify product approval, paid access where required and MFA. A copied URL does not grant permission.
Read Nora’s prepared narration
Link to this guideCompany toolsRun your company helpdesk
Available to paid workspaces
Keep company service tickets, assignments and private notes inside your own workspace.
Before you start
- Paid Company Workspace access and completed company MFA.
- Company support management permission for assignments, private notes and deletion.
Steps
- Open Company Workspace > Company helpdesk. A new company begins with an empty queue.
- Create a ticket with a subject, reproduction details, category and priority. Do not enter passwords or recovery codes.
- Open the ticket in the queue. Requesters see their own tickets and public replies; support managers see the company queue.
- A company support manager selects an eligible company assignee, updates priority and work status, and saves the current revision.
- Choose a public reply for the requester or a private internal note for support managers. Saving a reply does not claim external email delivery.
- Enter a clear resolution before selecting Resolved or Closed. Refresh when a concurrent change is reported.
- Use Open in new tab to work independently on another monitor. The URL retains the selected ticket.
- Managers may move a ticket to the 60-day recycle bin, restore it before its deadline or explicitly delete it permanently.
- For TLS Managed IT service, open /managed-it instead of routing the request into your own internal company queue.
Verify it works
- A different company cannot open this ticket.
- An ordinary requester cannot read private notes or another requester’s tickets.
- A closed ticket includes a resolution.
If you get stuck
- Attachments and external reply delivery are not part of this company helpdesk release. Use the approved TLS support flow when those service capabilities are needed.
- A stale revision means somebody else updated the ticket. Read their change before retrying.
Read Nora’s prepared narration
Link to this guideSecurity and lifecycleRecycle restore and purge accounts
Available with offboarding checks
Manage a 60-day recovery period for client users, staff and company profiles, with retained records kept separately.
Before you start
- The appropriate company user-management permission or verified TLS owner access.
- Complete external subscription, hosted-environment and agent offboarding before company purge.
Steps
- For company users, open Users and choose Recycle bin to view deleted identities and their recovery deadlines. Restore before the deadline or confirm permanent deletion.
- For internal staff, open the TLS owner staff-access management page. Deleted staff use the same 60-day recovery period. Existing unexpired shorter deadlines are extended by cleanup.
- For an entire company, TLS opens /companies, selects the company, then Overview > Company recycle bin and retention.
- Complete external subscription cancellation. Connect verifies a linked Stripe subscription is canceled before recycling its profile; this requires configured Billing provider access. End hosted-environment operations separately.
- Type the registered domain to recycle a company. Current sessions are revoked. The owner directory Recycle bin filter displays its deadline and any hold or error.
- Restore a company before the deadline. It returns to onboarding for review, without restarting paid services.
- Record a retention hold and reason when required. A hold pauses company purge; release it only after approved records review.
- Open /admin/account-recovery to inspect automatic cleanup status and retained company documents. The hosting maintenance handler and traffic fallback share one lease. An idle application depends on scheduler invocation.
- Retire real RMM agents before permanent company purge. Expired eligible records are cleaned in bounded batches; failures preserve retry information.
- Keep required contracts, accounting and historical audit/service records under their separate approved retention schedule. Their retention does not grant portal access to a deleted identity.
- In the owner company directory, choose Delete · move to Trash from the company status menu. Confirm the displayed company domain. Disabled clients have aligned Restore and Move to Trash actions.
- Open Company Trash to restore a retained company or request immediate permanent removal. A retention hold or active provider subscription prevents removal. Large company cleanup continues in batches; required agreements, invoices and audit history follow their own retention schedule.
Verify it works
- The deadline is 60 days after deletion.
- Deleted identities cannot use previous sessions or inherited access.
- A second company and TLS staff registrations remain intact.
If you get stuck
- A canceled external subscription must be verified; a local delete is not a vendor cancellation.
- A company that is already purging cannot be restored. Escalate the recorded cleanup error.
- Required HIPAA Security Rule documentation has a separate retention obligation; the recycle window does not replace it.
Provider documentation
Read Nora’s prepared narration
Link to this guideIdentity and accessCompany and TLS single sign-on
Implemented; verification required
Configure Microsoft, Google, Okta, OneLogin or SAML with immutable identity links and mandatory MFA.
Before you start
- An authorized administrator with mandatory MFA completed.
- The correct company and provider permissions; keep credentials out of screenshots and chat.
Steps
- TLS owners open /admin/identity for staff SSO. Company administrators open their company > Identity & SSO. Confirm the company ID and whether the connection is for platform staff or a customer.
- Create a web OIDC application in the correct provider. Microsoft uses its tenant UUID; Google uses the approved Workspace domain and web client; Okta and OneLogin use the validated organization issuer. Register the callback shown in the portal.
- Enter the client ID and protected client secret. Use only the supported provider issuer. Save and enable the connection. Configuration saved does not prove a real sign-in.
- Link each approved portal account to the provider immutable subject. Microsoft uses the tenant/object identity; Google, Okta and OneLogin use their immutable subject. Matching email or a public domain alone grants no access.
- For TLS SSO, open Company SSO at /login and enter tls or techlaststop.com. For a customer, enter its company ID or registered domain and choose its provider.
- Complete a real authorized demo sign-in and LastStop Verify/MFA. Test a wrong company, an unlinked subject, a suspended user and a revoked connection.
- Rotate credentials and review the resulting provider revision. Existing federated sessions must reauthenticate after configuration changes. Preserve an approved recovery path without disabling MFA.
Verify it works
- Provider verified state follows an actual completed callback.
- A customer identity cannot become a TLS staff owner.
- Dev/QA TLS access continues using the production identity authority.
If you get stuck
- Do not recreate users to fix a provider error; check the immutable link, tenant, issuer and callback.
- Per-company Dev/QA automatic provisioning and continuous identity mirroring are still separate implementation and acceptance gates.
Provider documentation
- learn.microsoft.com — reference 1
- developers.google.com — reference 2
- developer.okta.com — reference 3
- developers.onelogin.com — reference 4
Read Nora’s prepared narration
Link to this guideIdentity and accessBulk account setup and invitations
Implemented; live acceptance required
Review CSV accounts and apply bounded company-scoped batches.
Before you start
- Company user and role management permissions.
- A CSV under 2 MB containing no more than 10,000 reviewed users.
Steps
- Open Users → Bulk user setup and lifecycle.
- Use email, fullName, role, status and jobTitle columns. New company users normally use the user role; assign privileged roles deliberately.
- Choose Create, Update, Invite, Trash or Restore. Review the list before applying.
- Silent creation saves pending records without email. Use Invite existing users with the email checkbox to request activation messages.
- Pause between batches when needed. Keep the tab open and review each result before retrying a failed row.
Verify it works
- Every action uses the normal company-role, paid-seat and recovery checks.
- The directory can search and page past its first 100 users.
If you get stuck
- A reused email cannot currently belong to multiple separate company accounts. Manage or restore its existing record.
- If a connection fails during processing, refresh the directory before retrying because some rows may already be saved.
Read Nora’s prepared narration
Link to this guideIdentity and accessInvite personal email users
Implemented; live acceptance required
Invite named Gmail users without treating Gmail as a company domain.
Before you start
- An approved business company record.
- Administrator authorization for each external user.
Steps
- Create the company using its legitimate business identity; never claim gmail.com as an owned company domain.
- In bulk user creation, explicitly authorize the external addresses in the reviewed CSV.
- For Google sign-in, enable explicitly linked personal Gmail accounts in the company identity configuration.
- Link each approved user to its immutable Google subject and require the client authenticator.
Verify it works
- Unlinked Gmail users cannot sign in simply because their address is Gmail.
- Company permissions remain scoped to the approved company ID.
If you get stuck
- Do not use public email-domain ownership as evidence of tenant ownership.
Read Nora’s prepared narration
Link to this guideIdentity and accessRead a Microsoft or Google directory
Implemented; live acceptance required
Read paginated identities including users without assigned vendor licenses.
Before you start
- A configured company identity provider.
- Matching authorized directory credentials in Vendor licenses.
Steps
- Open Security → Microsoft & Google company sign-in → Read directory and bulk-link users.
- Read the complete directory snapshot. Existing adapters stop with an error if pagination cannot complete within their limit.
- Review active members, disabled identities and guests.
- Copy the prepared account CSV to Users for deliberate pending account creation; then review and apply the immutable identity-link CSV.
Verify it works
- Reading a directory creates no account, role or permission by itself.
- A tenant mismatch is rejected.
If you get stuck
- The reader supports at most 10,000 users per complete snapshot today.
- Continuous full-directory synchronization and automatic profile lifecycle propagation remain open. Existing scheduled license/group jobs are separate.
Read Nora’s prepared narration
Link to this guidePlatform operationsOwner storage pools and cost controls
Implemented; verification required
TLS owners monitor physical storage observations, company file usage, capacity evidence and costs. Customer roles cannot open these infrastructure controls.
Before you start
- An authorized administrator with mandatory MFA completed.
- The correct company and provider permissions; keep credentials out of screenshots and chat.
Steps
- Open Command center > Storage & capacity (/admin/storage). Search by company or component and choose the component. Current company data is separated by company ID in a shared D1 database; an inventory entry is not a dedicated database allocation.
- Read the measurement source. Database observations report D1 size metadata. Object usage is published after a complete resumable R2 scan. Company file usage sums recorded ticket attachments and documents; it excludes database rows and untracked objects.
- Obtain the actual provider allocation and record its evidence. Enter bytes, the 75% warning and 90% critical levels, and the current record revision. Save. Never enter an invented provider limit to make a percentage appear.
- Enter a monthly cost budget, decimal-GB storage rate, known fixed costs, attributed monthly revenue and target margin. The estimate covers only the costs entered, not unconfigured egress, operations, backups or taxes.
- Use Refresh observations to collect without sending email. Inspect the timestamp, source, stale-data state and scheduler result. The automatic production maintenance handler evaluates alerts on its configured five-minute schedule.
- Use Expansion plans to record requested capacity, a cost ceiling, reason, provider reference and verification evidence. Complete the actual provider operation and backup/restore acceptance before closing the change.
- Pause obsolete external inventory or move it to Trash. Restore within 60 days. A retention hold pauses inventory purge. This lifecycle changes the portal record; it never deletes a real database or bucket.
Verify it works
- Company and Managed IT customer accounts receive no capacity dashboard or API access.
- At exactly 75% the component warns; at exactly 90% it is critical. Unknown allocation remains unverified.
- A quota or budget edit does not create a provider purchase or customer charge.
If you get stuck
- If usage is zero, compare database bytes with file metadata; they measure different things.
- A provider D1 database cannot be enlarged beyond its supported limit; capacity growth may require partitioning or migration.
- Missing native quota access remains an owner setup gate, not a green readiness state.
Provider documentation
- developers.cloudflare.com — reference 1
- developers.cloudflare.com — reference 2
- developers.cloudflare.com — reference 3
Read Nora’s prepared narration
Link to this guideOperationsSearch and group the full audit history
Implemented; live acceptance required
Search retained events beyond the newest 500 and expand groups by day, person or event type.
Before you start
- TLS audit permission or company audit permission.
Steps
- Open Audit center or the company Activity tab.
- Search an actor, event, record ID or detail. Apply event, date, severity and outcome filters.
- Choose Day, Event type or Person grouping. Expand the desired group.
- Use Previous and Next for further results. Export this page downloads only the current filtered page.
Verify it works
- UTC timestamps remain exact and event IDs stay visible.
- A company user cannot read another company’s activity.
If you get stuck
- If the date range has no results, clear it and search again.
- Group counts describe the current page, not the entire retained history.
Read Nora’s prepared narration
Link to this guideIdentity and accessTLS-only Development and QA sign-in
Implemented; live acceptance required
Enter Dev or QA through the same TLS identity authority while preserving separate sessions and test data.
Before you start
- An active TLS owner account and registered LastStop Verify device.
Steps
- Use dev.connect.techlaststop.com or qa.connect.techlaststop.com.
- Start TLS sign-in even when you have no existing production session.
- Complete your existing approved sign-in and verification; the environment receives a short, scoped handoff.
- Verify access again after revoking the parent session.
Verify it works
- Application owner authorization protects the test environment before its hosting sign-in wall is removed.
- Provider or authority failure does not expose test data.
If you get stuck
- An unavailable authority is a sign-in problem, not a reason to reset existing factors.
- Customer automatic Dev/QA provisioning remains a separate unfinished service.
Read Nora’s prepared narration
Link to this guidePlatform operationsStorage alerts escalation and recovery
Implemented; verification required
Configure 75% and 90% alerts, monitor their delivery, acknowledge an incident and verify recovery.
Before you start
- An authorized administrator with mandatory MFA completed.
- The correct company and provider permissions; keep credentials out of screenshots and chat.
Steps
- In /admin/storage open Alert settings. Review the stale-data interval and enable owner email delivery. Recipients are active TLS platform owners from the staff directory; customer administrators are excluded.
- Verify a real measured component and actual allocation. Use a separate synthetic component for acceptance, never a customer quota. Do not upload credentials in screenshots.
- Record a fresh 75% observation through a scoped collector. Confirm one warning and one owner notification. Repeat the reading to confirm deduplication.
- Acknowledge the warning, then record 90%. Confirm the critical escalation reopens the alert and creates a new notification. Acknowledgment does not disable monitoring.
- Record a fresh reading below the warning threshold. Confirm recovery and retained history. A missing or stale reading must not resolve the incident.
- Open Delivery history. Queued, accepted, uncertain, failed and suppressed are distinct. Confirm receipt in the approved owner inbox. An uncertain send needs mailbox review before retrying.
- Inspect the hosting scheduler result and the independent monitoring provider. This application cannot prove availability while its own hosting is unavailable.
Verify it works
- Warning, critical and recovered transitions occur once each.
- Only current TLS owners receive queued emails and portal notifications.
- Disabled or departed owners are suppressed before sending.
If you get stuck
- A provider-accepted email is not inbox-delivery proof.
- If the cron has no recent completed result, investigate hosting scheduling and runtime logs.
- Record production email acceptance with an explicitly approved owner recipient.
Read Nora’s prepared narration
Link to this guidePlatform operationsConnect dedicated component telemetry
Implemented; verification required
Use a token restricted to one external component to submit measured storage bytes.
Before you start
- An authorized administrator with mandatory MFA completed.
- The correct company and provider permissions; keep credentials out of screenshots and chat.
Steps
- TLS creates an external component record in /admin/storage with the correct company and approved provider console URL. This registers inventory only.
- Open the component settings and generate the collector token. Store it immediately in the provider job secret store. It is shown once, hashed in Connect and expires after 90 days.
- Configure the provider job to POST to https://connect.techlaststop.com/api/capacity/observe with Authorization: Bearer <scoped token> and JSON containing bytes and observedAt in ISO UTC. Measure the real component using its provider API.
- Use a reading from the last five minutes, a nonnegative integer byte count and a timestamp at least ten seconds newer than the prior reading. The token determines the pool; a caller cannot select another company pool.
- Verify the recorded source and alert transition. Rotate before expiry by installing the new token in the provider job, then verify collection. Old tokens stop working immediately.
- Disable the collector before offboarding the provider job. Recycle inventory only after the external component lifecycle and retained-data obligations are complete.
Verify it works
- A token cannot write another component.
- Replay, stale readings and disabled tokens are rejected.
- Secrets never appear in audit detail.
If you get stuck
- HTTP 409 means the prior reading or token revision changed; read current state before retrying.
- An inventory entry and token do not install a provider scheduler.
Read Nora’s prepared narration
Link to this guideIdentity and accessConfigure SAML sign-in
Implemented; verification required
Configure a signed SAML connection without granting access from an email address alone.
Before you start
- An authorized administrator with mandatory MFA completed.
- The correct company and provider permissions; keep credentials out of screenshots and chat.
Steps
- Open the correct company Identity & SSO panel or /admin/identity. Select SAML and enter the HTTPS sign-in URL and exact IdP issuer.
- Paste the active IdP signing certificate into the protected configuration form. Use a currently valid certificate. Add the next certificate during a planned rollover. Keep private keys outside chat and source.
- Save the provider, then copy its displayed entity ID and ACS URL into the IdP SAML application. The entity ID includes this exact provider identifier; do not reuse another company metadata URL.
- Require signed responses and signed assertions, SHA-256 signatures, a persistent NameID, the registered audience and SP-initiated sign-in. Unsupported unsolicited assertions and insecure XML/signatures are rejected.
- Create explicit immutable NameID links for approved users. Assign a synthetic account to the IdP application, initiate sign-in in Connect and complete MFA.
- Accept the valid journey plus wrong audience, wrong issuer, stale/replayed response and disabled-provider rejection. Rotate the certificate with a documented overlap and retire the old certificate after acceptance.
Verify it works
- Only the configured issuer and persistent subject reach the company MFA step.
- Reusing the same response cannot create another session.
- Provider changes invalidate old local sessions.
If you get stuck
- Request signing is optional only when the IdP allows it; if required, configure a matching SP private key and public certificate in the protected form.
- The browser that starts sign-in must carry the proof cookie back to the registered ACS.
- Do not change TLS environment access controls to bypass a failed SAML connection.
Provider documentation
Read Nora’s prepared narration
Link to this guideIdentity and accessSCIM users groups and recovery
Implemented; verification required
Provision approved identities with scoped tokens while protecting company boundaries and administrator roles.
Before you start
- An authorized administrator with mandatory MFA completed.
- The correct company and provider permissions; keep credentials out of screenshots and chat.
Steps
- Configure the intended identity provider. In Identity & SSO expand SCIM provisioning and generate its connection token. Copy it once into the provider SCIM application secret field.
- Use https://connect.techlaststop.com/api/scim/v2 as the base URL. Map userName to the approved email and externalId to the exact immutable SSO subject. For Microsoft use the object identity required by the OIDC mapping; never substitute an email alias.
- Assign one authorized synthetic user first. Verify the created company user is basic, within the company and paid-seat capacity. TLS staff provisioning creates a viewer; it cannot create an owner.
- Before adopting an existing account, an administrator must approve its exact immutable link. Provisioning cannot take over an existing identity just because its email matches.
- Test display-name update, suspension, reactivation, pagination, group add/remove and stale version rejection. Groups contain only SCIM users from the same connection and do not grant roles by themselves.
- Test local deletion and its 60-day recycle entry. Protected administrators use the portal lifecycle workflow. Review a restored user and relink/reconcile its provider identity before resuming provisioning.
- Review the event log, last-used time and expiry. Rotate the 90-day token and replace it in the provider. Disable the connection immediately on offboarding or suspected credential exposure.
Verify it works
- Cross-company identifiers and revoked tokens are rejected.
- Password, role and paid-entitlement writes are rejected.
- Groups support up to 2,000 assigned portal users; list calls return at most 200 per page.
If you get stuck
- Only documented equality filters and PATCH operations are supported; SCIM bulk is not implemented. Use paginated provider provisioning.
- A connection token does not install or authorize an IdP application.
- A full multi-company membership model for one email address is not implemented.
Read Nora’s prepared narration
Link to this guidePlans and billingChoose individual services and compare prices
Implemented; verification required
Choose services, users and terms with separate Managed IT and Company Workspace pricing.
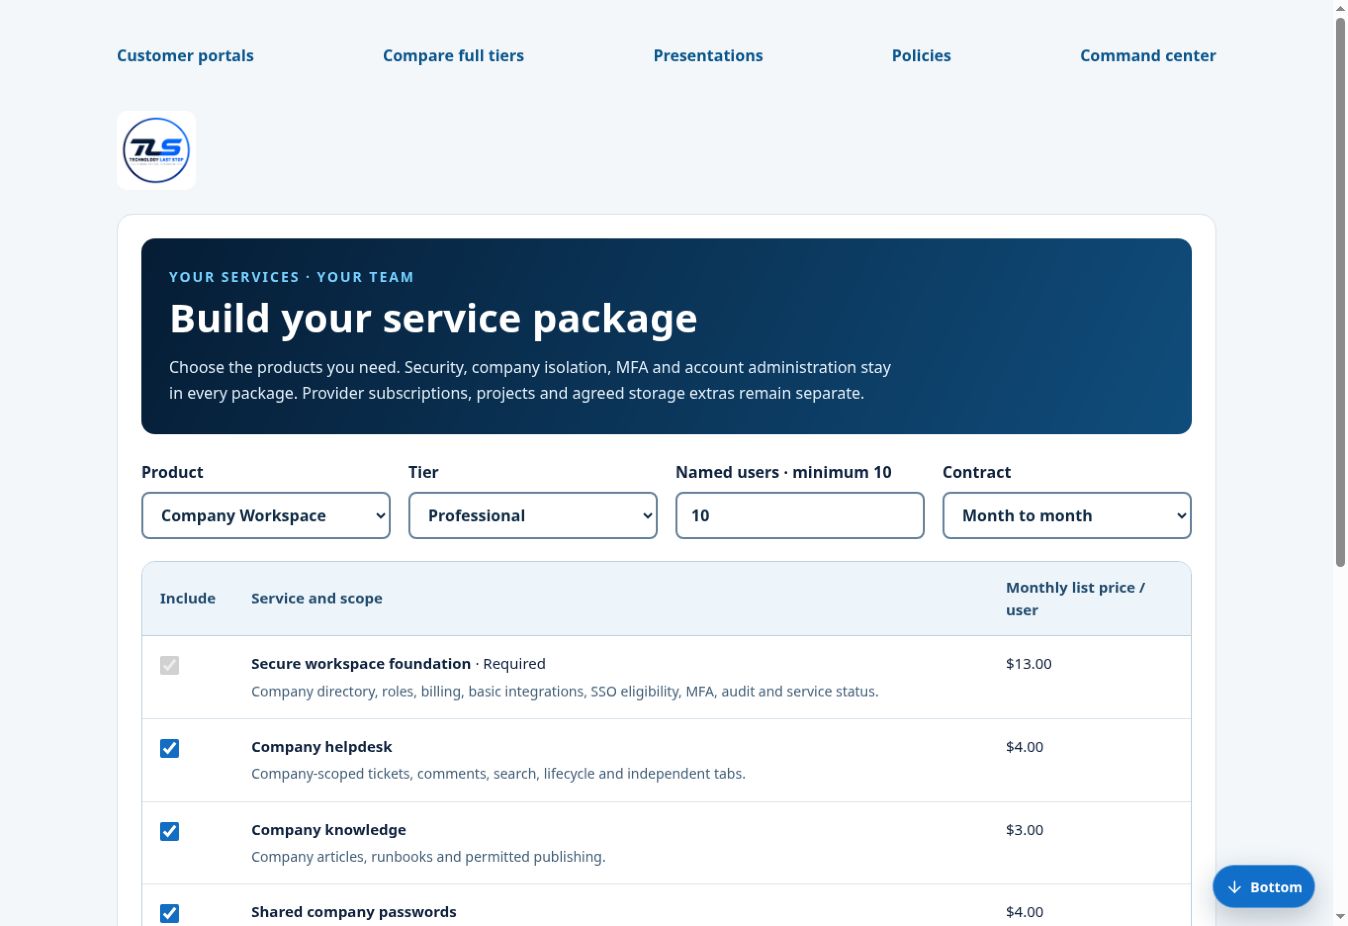
Before you start
- An authorized administrator with mandatory MFA completed.
- The correct company and provider permissions; keep credentials out of screenshots and chat.
Steps
- Open /configure. Choose Managed IT or Company Workspace, then Standard, Professional or Enterprise. Managed IT requires at least five users; Company Workspace requires ten.
- Review the service table. Keep the secure foundation selected. Add the service capabilities you need. Required dependencies are shown and enforced; security and MFA cannot be removed.
- Select month to month, one year, two years or three years. Compare the full prepaid term total with the monthly equivalent. Annual, two-year and three-year prepaid discounts are 8%, 12% and 15%.
- Open a reusable selection link or request onboarding. The request form carries the reviewed configuration as notes; it is not a signed agreement or payment.
- Inside the approved company, open Plans & billing > Build your service package. Save a request. Monthly requests become quotes; fixed terms go to TLS for review.
- The authorized signer accepts the exact quote, named-user count, service list and policies. Use secure checkout only when billing readiness is complete. A saved or accepted quote grants no paid access.
- Review activation, paid-through date and retained agreement history. For an existing Stripe subscription, request a reviewed service change so a second subscription is not created.
- Cancel an unfulfilled request or recycle an eligible draft for 60 days. Restore a draft to review; previously signed cancelled requests retain their acceptance record and require a new quote for changes.
Verify it works
- The six complete service bundles match $19/$39/$69 Workspace and $79/$129/$199 Managed IT monthly prices.
- Five Managed IT Standard users cost $395/month or $4,360.80 for one year prepaid, before extras.
- A paid selected Workspace excludes unpurchased tool permissions on the server.
If you get stuck
- Fixed-term review is required; do not describe its draft status as a payment failure.
- Extra storage, vendor fees and projects require a disclosed order. Internal capacity alarms do not auto-charge customers.
Read Nora’s prepared narration
Link to this guideDevice operationsPrepare signed RMM packages and remote support
Implemented; verification required
Prepare native delivery and controlled device acceptance before enabling customer downloads.
Before you start
- An authorized administrator with mandatory MFA completed.
- The correct company and provider permissions; keep credentials out of screenshots and chat.
Steps
- TLS owners open /admin/rmm-preparation. Download the preparation pack and the owner-only reference-client source ZIP. The Node 22 reference client demonstrates enrolled heartbeat, bounded inventory and approved diagnostics; it is not a signed native installer or remote desktop transport.
- Build the native agent for the supported OS and architecture using controlled CI. Use OS secret storage, least privileges, visible service identity, a bounded inventory and an uninstaller.
- Sign the exact binary with the TLS-controlled publisher identity. Verify Windows Authenticode, macOS signing/notarization or Linux signed repository metadata as appropriate. Record the checksum and source SHA.
- Test clean installation, upgrade, rollback and uninstall on authorized synthetic devices. Create one-time company/device enrollment links; do not embed a universal credential.
- Accept heartbeat, inventory, command expiry, consent, audit, credential rotation and disconnect recovery. A native agent needs a local execution journal to avoid duplicate commands after restart.
- Accept the remote-session provider and transport separately. Verify customer consent, session termination and audit. A portal request is not a remote desktop connection.
- Publish verified packages through Downloads & releases and use a limited rollout. Monitor check-in traffic, errors and storage. Keep the previous signed release.
- Suspend faulty releases, revoke affected credentials and expire queued commands. Offboard and verify device uninstall before company purge.
Verify it works
- Only the accepted company and device can enroll with its token.
- A cancelled, expired or unapproved command cannot execute.
- Uninstall removes the service and its local credential.
If you get stuck
- Native binaries, signing identities, provider licensing and real device acceptance are still required.
- iOS and Android require separate MDM and OS-permission work; desktop remote-control behavior cannot be assumed.
- The reference client keeps a local execution journal, rotates its credential and sends terminal command results. It does not execute arbitrary shell commands. Signed native distribution and real device acceptance remain required.
Read Nora’s prepared narration
Link to this guideIntegrationsConnect and govern provider services
Implemented; verification required
Configure a provider for one company, verify read access, enable paged synchronization and retain clear lifecycle evidence.
Before you start
- An authorized administrator in the correct company or the TLS owner console, with mandatory verification completed.
- Use an approved synthetic account for acceptance. Keep credentials, personal data and recovery codes out of recordings.
Steps
- TLS owners open Command Center > Connected services. Company Workspace administrators use Integrations > Connected services. Managed IT clients can view licensed results; TLS manages their protected provider configuration.
- Choose the service and review its exact supported operation. A catalog listing or saved configuration does not mean the account is connected. Confirm the customer’s paid product, plan and selected services.
- Use Configure to enter credentials only in the protected form. The TLS platform and each company have separate secret records; saving one does not copy it to another company or Dev/QA. Record the real provider expiry or a planned rotation date.
- Select Verify read access. Confirm the provider tenant, mailbox, company or project is correct. Verification reads a bounded page without purchasing licenses or generating AI output. Configuration changes clear old verification.
- Enable synchronization after successful verification. Read the next page or let an accepted scheduler continue from the stored cursor. Current means the present pass completed; inspect its measurement time and run history.
- Use search, dates and page controls for recorded results. Recheck source permissions before opening a provider link. Last seen is a local observation time, not proof the provider account remains active indefinitely.
- Pause to stop collection. Delete moves a connection to its 60-day recycle period. Restore leaves it paused and requires new verification. Permanent removal deletes local credentials and cached results; it does not delete the vendor account. Retention holds apply.
Verify it works
- A company cannot select another company or the TLS platform scope.
- Changed credentials require new verification; expired credentials stop synchronization.
- A running connection cannot be deleted while it holds its execution lease.
If you get stuck
- Actual consent, protected credentials, complete provider pagination and a scheduled invocation must be accepted. No provider account was authorized merely by publishing this guide.
- Dev and QA block external actions by default. They do not use production service credentials.
Read Nora’s prepared narration
Link to this guideEmail and communicationsGmail intake and scoped support tickets
Implemented; verification required
Read a dedicated Gmail inbox and convert reviewed messages into tickets for approved paid company users.
Before you start
- An authorized administrator in the correct company or the TLS owner console, with mandatory verification completed.
- Use an approved synthetic account for acceptance. Keep credentials, personal data and recovery codes out of recordings.
Steps
- Authorize the intended Gmail mailbox. Personal Gmail uses OAuth offline consent. Google Workspace can instead use a service account with domain-wide delegation approved by its administrator. Grant Gmail read access to the dedicated support mailbox.
- Open Connected services > Gmail and Google Workspace intake. Enter all three OAuth fields or the delegated service account email and complete PEM key, plus the exact mailbox. Save protected credentials, verify mailbox identity and enable the connection.
- Run the first complete inbox scan. Subsequent runs use Gmail history checkpoints. When Google reports an expired checkpoint, Connect starts a new inbox pass. Use the recorded page state until that pass completes.
- Review a message header and choose Create scoped support ticket. The sender must match exactly one active approved company user with an active subscription. Unknown, ambiguous or automated messages need review in Gmail.
- A company Workspace connection creates a company helpdesk ticket. TLS platform intake and Managed IT connections create TLS support tickets for the matched company. A message ID and mailbox claim prevent repeat conversion.
- Read the resulting ticket. Body text is imported; attachments remain in the source mailbox and are listed by name only. This action does not grant sign-in access, forward attachments or send an acknowledgment.
- Pause or recycle the connection during offboarding. Reconnection does not invalidate the retained duplicate-prevention evidence. Accept a real approved mailbox and one harmless message before using intake operationally.
Verify it works
- Read checkpoints remain scoped to the authorized mailbox.
- Another company’s sender cannot be accepted by a company-scoped inbox.
- Disabling the company or user during import prevents a new ticket.
If you get stuck
- Automatic conversion of every incoming message, reply threading and Gmail attachment import are not enabled. Current conversion is a reviewed action.
Provider documentation
Read Nora’s prepared narration
Link to this guidePlans and billingLastStop HQ — Owner Console · CRM & Finance
Connect-authenticated owner Site active; signed-in role acceptance required
A dedicated owner-only planning system for customers, sales, subscriptions, financial entries, goals, forecasts, the shared invoice register, activity and branded reports.
Before you start
- An active TLS owner account with LastStop Verify completed. Company administrators and non-owner TLS staff cannot enter this workspace.
- Use an approved synthetic account for acceptance. Keep credentials, personal data and recovery codes out of recordings.
Steps
- Open LastStop HQ at https://hq.techlaststop.com. Command Center > LastStop HQ · CRM & Finance opens it in a new tab. HQ uses the same LastStop Connect credentials and LastStop Verify flow as connect.techlaststop.com; it never uses ChatGPT sign-in. Its host-only session checks the active parent owner authority on every protected request. Customer-company owners, company administrators, billing contacts and non-owner TLS staff are denied.
- Use the single global search, currency selector, refresh control and View options to simplify the workspace. Review centered activity notices for newly detected invoices, drafts and knowledge; close them outside only when no text is at risk, otherwise Save, Continue editing or Discard.
- Use Business 360 to compare actual income, spending, pipeline, goals, gaps and transparent forecasts. Forecasts are planning estimates, not guarantees. Download branded customer or portfolio reports as PDF, Word, Excel or PowerPoint and print the approved TLS presentation layout.
- Choose a currency and accounting period. Recorded cash received is posted income less posted refunds. Expenses are posted costs; savings and opportunity values are separate and do not increase cash. Different currencies are never added together.
- Use Add entry to draft an expense, income, refund or saving with date, category, reference and optional company. Review it before posting. Owner-entered dates represent accounting dates. Provider receipt times retain the provider timestamp.
- Verified paid subscription invoices are recorded once from the payment acceptance workflow. Imported QuickBooks, Xero and Stripe invoice inventories do not themselves create paid entitlements or post an accounting receipt.
- A posted entry is retained. Correct an owner-entered posted mistake with a reasoned void and a new record. Provider receipts cannot be silently edited or voided from this page. Financial drafts can be recycled and restored for 60 days, subject to retention holds.
- Open Customer billing to search a company by name, domain or Customer ID, then open its protected billing and contact settings. Paid-through is a service entitlement date; consult the actual invoice for its due date.
- Open Invoices for the same invoice register used by Command Center > Billing and invoices. Search company, invoice number, email or notes; use the 25-record pages and Current or Trash filter. Invoices are denominated in USD. Saved changes notify other open invoice tabs in the same environment; a visible view also refreshes every 5 seconds. Separate environments retain separate records.
- Create an invoice in the centered editor. The approved horizontal TLS logo appears in PDF exports. Local invoice status changes do not charge a card, record provider-confirmed cash or activate a subscription. Signed Stripe invoice events synchronize saved invoices into the same register, including drafts created through Stripe tools in ChatGPT. Text written only in a chat has no invoice record. Other providers require their own accepted integration.
- An owner can move an unissued, unpaid invoice draft to Trash, restore it, or confirm permanent deletion immediately. Deletion removes the draft and its line items; the audit event remains. Issued invoices and payment evidence cannot be converted into deletable drafts. Refresh if another view changed the record.
- Open Stripe invoice synchronization to import historical invoices in batches of five, inspect pending work and retry failures. Provider USD totals, partial payments and remaining balance are authoritative. Company assignment uses an explicit Stripe customer mapping, never a guessed email. Edit or delete a Stripe draft at its source; after source deletion, its local draft mirror can be permanently removed from Trash. Retries cannot recreate a deleted source invoice.
- Use Sales pipeline to track a company opportunity, stage, amount and follow-up date. It neither activates a subscription nor sends a message. Review, update, recycle or restore an opportunity as needed.
- Use Cards and provider billing to reach hosted billing controls. Enter card data only on the authorized payment-provider page. This console does not collect card numbers, purchase storage or create vendor subscriptions.
- Production Capacity Watch opens https://connect.techlaststop.com/admin/storage, including when you open the finance view from Development or QA. Check the destination label before switching environments.
Verify it works
- Only a verified TLS owner can read or modify the financial ledger.
- Duplicate paid invoice events produce one receipt record.
- Unpaid invoices do not create recorded paid receipts.
- A saved Command Center invoice appears in owner CRM > Invoices with the same number and total.
- Trash, restore and immediate permanent deletion preserve issued invoices and reject stale updates.
- An anonymous user, a customer-company owner, a non-owner TLS staff member and an owner with an unverified or revoked parent session cannot enter HQ or its APIs.
- Duplicate and out-of-order Stripe invoice events preserve one canonical record; failed imports remain visible for retry.
If you get stuck
- Totals are only as complete as recorded expenses, refunds and historical imports; this is not a reconciled accounting statement.
- Bank feed reconciliation, automatic provider expense imports and installed TLS vendor payment methods remain separate setup.
- If hq.techlaststop.com is unavailable, use the native owner-private recovery address and check the Sites custom-domain status before changing DNS.
- Stripe artwork upload is separate from key and portal verification. Both the square icon and horizontal logo must be present.
- Cross-domain invoice views refresh every 5 seconds while visible; provider delivery delays and retries can add time.
Provider documentation
Read Nora’s prepared narration
Link to this guideCompany administrationChoose the company time zone
Implemented; verification required
Use a location-based time zone so summer and winter times display correctly.
Before you start
- An authorized administrator in the correct company or the TLS owner console, with mandatory verification completed.
- Use an approved synthetic account for acceptance. Keep credentials, personal data and recovery codes out of recordings.
Steps
- During Create company, search for the location’s IANA zone and confirm it with the company. Browser location is only a suggested starting point.
- Choose America/New_York for Eastern US locations, America/Chicago for Central, America/Denver for Mountain, America/Phoenix for Arizona where appropriate, or the location’s actual region. Fixed labels such as EST and CST are not accepted as company zones.
- After setup, open Portal settings and update Time zone. Save against the current settings revision to avoid overwriting another administrator’s changes.
- Review company helpdesk, passwords, knowledge, device jobs, license observations and security times. Stored event timestamps remain unchanged; the selected location controls their display.
- Test an event in summer and winter. Accounting dates and date-only fields are calendar dates; they are not shifted as if they were an event timestamp.
Verify it works
- America/New_York uses the correct daylight-saving offset.
- America/Phoenix and America/Denver can display different summer times.
If you get stuck
Read Nora’s prepared narration
Link to this guidePortal display and navigationCreate edit minimize and recover a draft
Implemented; verification required
Work in a centered editor with a consistent close control and visible lifecycle dates.
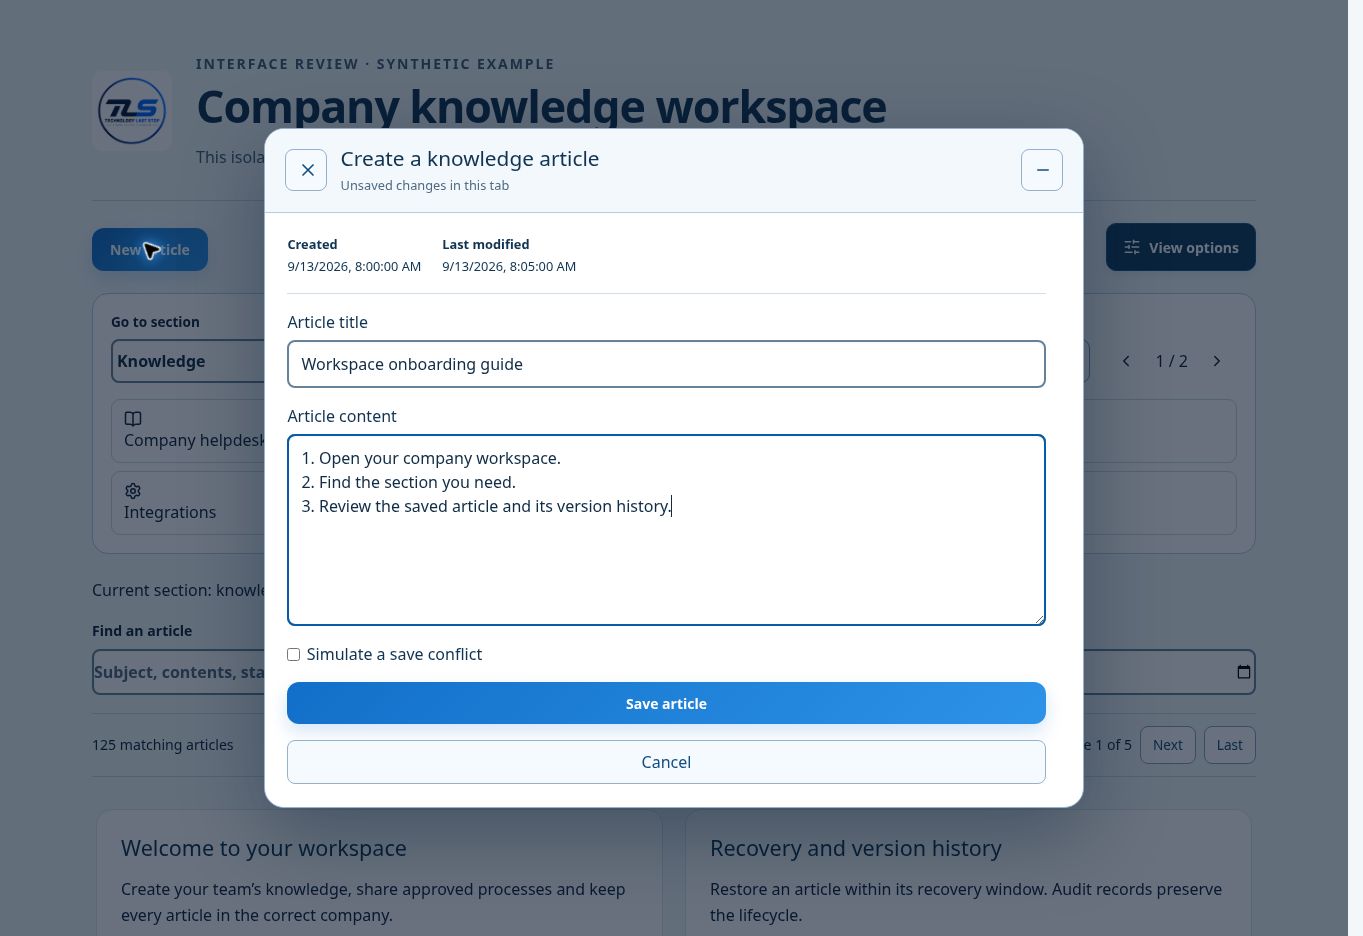
Before you start
- An authorized administrator in the correct company or the TLS owner console, with mandatory verification completed.
- Use an approved synthetic account for acceptance. Keep credentials, personal data and recovery codes out of recordings.
Steps
- Open New or Edit in the supported knowledge, password, company, user, ticket and configuration workflows. The editor appears in the center of the screen; the top-left X closes it and the top-right control minimizes it.
- Use the visible field labels. Search controls have one outline; record forms keep clear focus and required-field feedback. Tab navigation remains inside the active dialog.
- Minimize to inspect the current page, then restore the draft from its control. Sensitive drafts stay in the current tab memory and are not saved in local browser storage.
- Click outside the dialog, press Escape or choose Close. If the form changed, choose Save, Discard or Keep editing. A failed save keeps the draft and shows the error in the dialog.
- Review Created and Last modified when available. Saving existing content checks its version so a stale editor cannot overwrite a newer record.
- Use section search, the section menu and Previous/Next controls to move through long collections. Date and content filters operate over the whole supported collection, not just the current page.
Verify it works
- Outside-click close does not silently discard edits.
- Saved collection view choices remain independent in separate browser tabs.
- Minimized drafts warn before supported navigation or leaving the page.
If you get stuck
- A draft is not durable until Save succeeds. Browser crashes or closing the tab can lose unsaved text.
Read Nora’s prepared narration
Link to this guidePlans and billingBilling contacts reminders and receipts
Implemented; verification required
Maintain one primary and two additional billing contacts without collecting card details in Connect.
Before you start
- An authorized administrator in the correct company or the TLS owner console, with mandatory verification completed.
- Use an approved synthetic account for acceptance. Keep credentials, personal data and recovery codes out of recordings.
Steps
- The TLS owner or an authorized company billing manager opens Plans & billing > Billing contacts. Confirm all recipients belong to the customer’s approved billing workflow.
- Save one primary and up to two additional addresses. A distribution address may be used when the company has approved its membership and delivery settings. Contact changes do not grant account access.
- Choose the paid service package, plan and user quantity. Managed IT new orders require at least five users; Company Workspace requires ten. Existing signed agreements are not silently replaced.
- Review the exact quote and term before secure hosted checkout. Paid entitlements and added seats remain gated on verified provider payment; a draft, redirect or webhook with an invalid signature cannot activate them.
- Review account notices and delivery results. Monthly reminders target 7, 3 and 1 day before the entitlement end; fixed-term reminders use 90, 30, 14 and 7 days. Late setup sends the next applicable reminder without a backlog.
- After payment, verify the branded invoice or receipt and all approved recipient deliveries. Provider-accepted mail and inbox receipt are separate acceptance steps. Review uncertain outcomes before retrying.
- To save or change a company card, use the verified hosted billing portal. Never enter a card number, security code or API key in chat, a ticket or a screenshot.
Verify it works
- A fourth billing contact is rejected.
- A failed payment cannot add paid seats.
- Already accepted notice deliveries are not sent again after a contact change.
If you get stuck
- The restricted live application key and a safe Customer Portal configuration are still required for live billing acceptance.
- The connector denied creating a portal configuration. Configure it through an authorized Stripe account path and enter the resulting bpc_ ID in the protected form.
Read Nora’s prepared narration
Link to this guideStorage and capacityRun observe and recover storage collection
Implemented; verification required
Use owner-only measurements and explicit scheduler evidence for capacity decisions.
Before you start
- An authorized administrator in the correct company or the TLS owner console, with mandatory verification completed.
- Use an approved synthetic account for acceptance. Keep credentials, personal data and recovery codes out of recordings.
Steps
- TLS owners open Storage & capacity. Current records live in the environment’s shared application database, separated by company ID. File objects use protected object storage. A customer does not currently receive a physical database just by subscribing.
- Record an actual provider allocation with its reference and evidence. A pool without verified allocation or a complete recent reading remains unknown. Company file metadata does not include all database pages, backups, untracked objects or provider charges.
- Run a manual collection to confirm access. Database and object observations are separate. Large object inventories resume from a durable cursor; an unfinished pass does not claim a complete total.
- Configure the independent runner using the owner-only endpoint and a protected 90-day runner token. The downloadable Node 22 runner includes the contract. Store its token in the scheduler’s secret manager; never in a URL or source repository.
- Accept a real scheduled invocation and inspect the recorded caller, last started/completed time, lease and error. In-app traffic recovery is not proof of cron operation. The backup capacity watch only reads observations and cannot start collectors.
- Use default 75% warning and 90% critical thresholds or enter an approved pool-specific pair. Investigate newly stale/error readings as well as capacity thresholds. Acknowledgment records review; it does not clear the measured condition.
- For expansion, review costs, margin, backup/restore and a provider capacity-change proposal. Approve the provider purchase separately, verify the resulting allocation and fresh measurement, then record completion. Changing a number in this console does not purchase storage.
- Pause, repair and rotate the runner when needed. Interrupted work can resume after the bounded lease expires. Restore recycled component records within 60 days; deleting their inventory record does not delete physical infrastructure.
Verify it works
- A stale or unverified pool cannot be called healthy.
- Collectors and alerts are visible only to TLS owners.
- The same running collection cannot be claimed by overlapping invocations.
If you get stuck
- Provider quotas, cloud allocation credentials, independent scheduling and email receipt still require live acceptance.
- No automatic purchase or overage charge is triggered by capacity thresholds.
Read Nora’s prepared narration
Link to this guideCommunicationsMicrosoft Teams setup and acceptance
Implemented; verification required
Read the authorized team’s channel directory. Outlook / Teams meeting scheduling remains in Appointments. Channel messaging needs a separately accepted Teams workflow.
Before you start
- An authorized administrator in the correct company or the TLS owner console, with mandatory verification completed.
- Use an approved synthetic account for acceptance. Keep credentials, personal data and recovery codes out of recordings.
Steps
- Authorize the intended Microsoft tenant application for the documented channel-list operation and record the exact team ID. A client secret cannot exceed Microsoft’s 24-month maximum; choose the actual allowed expiry and plan earlier rotation. Certificate authentication is recommended by Microsoft but this adapter currently accepts a client secret.
- Open Connected services > Microsoft Teams. In the correct company or TLS scope, enter Microsoft tenant ID, Application client ID, Client secret, Authorized team ID in the protected form. Record the provider expiry or planned rotation date.
- Save and Verify read access. Confirm the returned identity and records with the vendor console. A failed verification stays a setup issue; it cannot be treated as a working connection.
- Enable synchronization. Review the complete paged pass and its timestamp. Search saved records and open source links only when your provider account permits it.
- Pause before offboarding or credential replacement. Saving new credentials clears verification. Recycled connections retain a 60-day recovery window, with restoration paused until reverified.
Verify it works
- Minimum catalog eligibility: Standard. Selected service dependencies and an active paid subscription also apply.
- TLS platform credentials and company credentials remain separate.
- Accept one complete provider pass and a real scheduled continuation before claiming the service is connected.
If you get stuck
- Teams channel messaging and retired Office 365 incoming connectors are not enabled by this directory reader.
Provider documentation
Read Nora’s prepared narration
Link to this guideITSM / PSAJira / Jira Service Management setup and acceptance
Implemented; verification required
Import permitted issue references, status and update times from the selected project. Jira remains authoritative for external changes.
Before you start
- An authorized administrator in the correct company or the TLS owner console, with mandatory verification completed.
- Use an approved synthetic account for acceptance. Keep credentials, personal data and recovery codes out of recordings.
Steps
- Authorize a Jira service identity with Browse Projects for the intended project. Record the root HTTPS atlassian.net site, email, API token and project key.
- Open Connected services > Jira / Jira Service Management. In the correct company or TLS scope, enter Atlassian site URL, Service account email, API token, Jira project key in the protected form. Record the provider expiry or planned rotation date.
- Save and Verify read access. Confirm the returned identity and records with the vendor console. A failed verification stays a setup issue; it cannot be treated as a working connection.
- Enable synchronization. Review the complete paged pass and its timestamp. Search saved records and open source links only when your provider account permits it.
- Pause before offboarding or credential replacement. Saving new credentials clears verification. Recycled connections retain a 60-day recovery window, with restoration paused until reverified.
Verify it works
- Minimum catalog eligibility: Professional. Selected service dependencies and an active paid subscription also apply.
- TLS platform credentials and company credentials remain separate.
- Accept one complete provider pass and a real scheduled continuation before claiming the service is connected.
If you get stuck
- This reads permitted issues with enhanced JQL pagination. It does not create, assign or edit Jira issues or synchronize attachments.
Provider documentation
Read Nora’s prepared narration
Link to this guideDocumentation & passwordsConfluence setup and acceptance
Implemented; verification required
Search a paged index of authorized Confluence pages and open the source article. Source access controls continue to apply.
Before you start
- An authorized administrator in the correct company or the TLS owner console, with mandatory verification completed.
- Use an approved synthetic account for acceptance. Keep credentials, personal data and recovery codes out of recordings.
Steps
- Authorize a service identity that can view only the required Confluence space. Record the root HTTPS atlassian.net site, service email, API token and numeric space ID.
- Open Connected services > Confluence. In the correct company or TLS scope, enter Atlassian site URL, Service account email, API token, Authorized space ID in the protected form. Record the provider expiry or planned rotation date.
- Save and Verify read access. Confirm the returned identity and records with the vendor console. A failed verification stays a setup issue; it cannot be treated as a working connection.
- Enable synchronization. Review the complete paged pass and its timestamp. Search saved records and open source links only when your provider account permits it.
- Pause before offboarding or credential replacement. Saving new credentials clears verification. Recycled connections retain a 60-day recovery window, with restoration paused until reverified.
Verify it works
- Minimum catalog eligibility: Professional. Selected service dependencies and an active paid subscription also apply.
- TLS platform credentials and company credentials remain separate.
- Accept one complete provider pass and a real scheduled continuation before claiming the service is connected.
If you get stuck
- Only page metadata and source links are imported. Page bodies, permissions, attachments and editing remain in Confluence.
Provider documentation
Read Nora’s prepared narration
Link to this guideIdentity & SSOAzure / Microsoft Entra directory setup and acceptance
Implemented; verification required
Read tenant users and account state. User inventory never grants portal access; SSO, immutable identity links and SCIM govern sign-in.
Before you start
- An authorized administrator in the correct company or the TLS owner console, with mandatory verification completed.
- Use an approved synthetic account for acceptance. Keep credentials, personal data and recovery codes out of recordings.
Steps
- Authorize Graph User.Read.All application access for the intended tenant, grant the tenant administrator’s consent and record its immutable tenant ID.
- Open Connected services > Azure / Microsoft Entra directory. In the correct company or TLS scope, enter Microsoft tenant ID, Application client ID, Client secret in the protected form. Record the provider expiry or planned rotation date.
- Save and Verify read access. Confirm the returned identity and records with the vendor console. A failed verification stays a setup issue; it cannot be treated as a working connection.
- Enable synchronization. Review the complete paged pass and its timestamp. Search saved records and open source links only when your provider account permits it.
- Pause before offboarding or credential replacement. Saving new credentials clears verification. Recycled connections retain a 60-day recovery window, with restoration paused until reverified.
Verify it works
- Minimum catalog eligibility: Standard. Selected service dependencies and an active paid subscription also apply.
- TLS platform credentials and company credentials remain separate.
- Accept one complete provider pass and a real scheduled continuation before claiming the service is connected.
If you get stuck
- This inventory does not create SSO links or SCIM provisioning. Configure and accept Identity & SSO separately.
Provider documentation
Read Nora’s prepared narration
Link to this guideRMM & devicesManageEngine Endpoint Central Cloud setup and acceptance
Implemented; verification required
Import the connected organization’s Endpoint Central device inventory. Native remote control and remediation remain in the authorized provider console until accepted.
Before you start
- An authorized administrator in the correct company or the TLS owner console, with mandatory verification completed.
- Use an approved synthetic account for acceptance. Keep credentials, personal data and recovery codes out of recordings.
Steps
- Authorize the correct Endpoint Central Cloud organization through Zoho OAuth with DesktopCentralCloud.Common.READ, and select its documented data-center domain.
- Open Connected services > ManageEngine Endpoint Central Cloud. In the correct company or TLS scope, enter OAuth client ID, OAuth client secret, Authorized refresh token, Data-center domain in the protected form. Record the provider expiry or planned rotation date.
- Save and Verify read access. Confirm the returned identity and records with the vendor console. A failed verification stays a setup issue; it cannot be treated as a working connection.
- Enable synchronization. Review the complete paged pass and its timestamp. Search saved records and open source links only when your provider account permits it.
- Pause before offboarding or credential replacement. Saving new credentials clears verification. Recycled connections retain a 60-day recovery window, with restoration paused until reverified.
Verify it works
- Minimum catalog eligibility: Professional. Selected service dependencies and an active paid subscription also apply.
- TLS platform credentials and company credentials remain separate.
- Accept one complete provider pass and a real scheduled continuation before claiming the service is connected.
If you get stuck
- This adapter is Cloud inventory. On-premises Endpoint Central, vulnerability ingestion, agent installation and remote control require separate supported contracts and acceptance.
Provider documentation
Read Nora’s prepared narration
Link to this guideFinanceQuickBooks Online setup and acceptance
Implemented; verification required
Read invoice balances and due dates from one authorized QuickBooks company. Imported balances do not activate a LastStop subscription.
Before you start
- An authorized administrator in the correct company or the TLS owner console, with mandatory verification completed.
- Use an approved synthetic account for acceptance. Keep credentials, personal data and recovery codes out of recordings.
Steps
- Authorize the intended QuickBooks Online company with its accounting OAuth scope. Record the returned realm ID and protected refresh token.
- Open Connected services > QuickBooks Online. In the correct company or TLS scope, enter OAuth client ID, OAuth client secret, Authorized refresh token, QuickBooks company / realm ID in the protected form. Record the provider expiry or planned rotation date.
- Save and Verify read access. Confirm the returned identity and records with the vendor console. A failed verification stays a setup issue; it cannot be treated as a working connection.
- Enable synchronization. Review the complete paged pass and its timestamp. Search saved records and open source links only when your provider account permits it.
- Pause before offboarding or credential replacement. Saving new credentials clears verification. Recycled connections retain a 60-day recovery window, with restoration paused until reverified.
Verify it works
- Minimum catalog eligibility: Professional. Selected service dependencies and an active paid subscription also apply.
- TLS platform credentials and company credentials remain separate.
- Accept one complete provider pass and a real scheduled continuation before claiming the service is connected.
If you get stuck
- Provider access is read-only in Connect. Accounting scope itself may permit more, so protect and restrict the provider application. No bank feed, expense posting or payment action is performed.
Provider documentation
Read Nora’s prepared narration
Link to this guideFinanceXero setup and acceptance
Implemented; verification required
Read sales and purchase invoice totals, due dates and payment state from the selected Xero organization.
Before you start
- An authorized administrator in the correct company or the TLS owner console, with mandatory verification completed.
- Use an approved synthetic account for acceptance. Keep credentials, personal data and recovery codes out of recordings.
Steps
- Authorize the exact Xero tenant with invoice read scopes and offline access. Record its tenant ID. Token rotation is persisted before the next data request.
- Open Connected services > Xero. In the correct company or TLS scope, enter OAuth client ID, OAuth client secret, Authorized refresh token, Xero tenant ID in the protected form. Record the provider expiry or planned rotation date.
- Save and Verify read access. Confirm the returned identity and records with the vendor console. A failed verification stays a setup issue; it cannot be treated as a working connection.
- Enable synchronization. Review the complete paged pass and its timestamp. Search saved records and open source links only when your provider account permits it.
- Pause before offboarding or credential replacement. Saving new credentials clears verification. Recycled connections retain a 60-day recovery window, with restoration paused until reverified.
Verify it works
- Minimum catalog eligibility: Professional. Selected service dependencies and an active paid subscription also apply.
- TLS platform credentials and company credentials remain separate.
- Accept one complete provider pass and a real scheduled continuation before claiming the service is connected.
If you get stuck
- A paid external invoice does not activate a LastStop subscription. Bank reconciliation and write-back are not included.
Provider documentation
Read Nora’s prepared narration
Link to this guideFinanceStripe financial visibility setup and acceptance
Implemented; verification required
Read invoices using a restricted key for the selected Stripe account. Payment collection uses the separately verified LastStop Billing setup.
Before you start
- An authorized administrator in the correct company or the TLS owner console, with mandatory verification completed.
- Use an approved synthetic account for acceptance. Keep credentials, personal data and recovery codes out of recordings.
Steps
- Create a restricted read key for the intended Stripe account and invoice reads. Verify the exact expected acct_ ID. Do not use a broad secret key where a restricted key is sufficient.
- Open Connected services > Stripe financial visibility. In the correct company or TLS scope, enter Restricted Stripe key, Expected Stripe account ID in the protected form. Record the provider expiry or planned rotation date.
- Save and Verify read access. Confirm the returned identity and records with the vendor console. A failed verification stays a setup issue; it cannot be treated as a working connection.
- Enable synchronization. Review the complete paged pass and its timestamp. Search saved records and open source links only when your provider account permits it.
- Pause before offboarding or credential replacement. Saving new credentials clears verification. Recycled connections retain a 60-day recovery window, with restoration paused until reverified.
Verify it works
- Minimum catalog eligibility: Professional. Selected service dependencies and an active paid subscription also apply.
- TLS platform credentials and company credentials remain separate.
- Accept one complete provider pass and a real scheduled continuation before claiming the service is connected.
If you get stuck
- This is a financial reader. The separate Billing provider setup controls checkout, signed webhooks and Customer Portal safety.
Provider documentation
Read Nora’s prepared narration
Link to this guideInternal AIOpenAI / ChatGPT models setup and acceptance
Implemented; verification required
Use your dedicated OpenAI API project for explicit drafting requests. ChatGPT application subscriptions do not include API usage.
Before you start
- An authorized administrator in the correct company or the TLS owner console, with mandatory verification completed.
- Use an approved synthetic account for acceptance. Keep credentials, personal data and recovery codes out of recordings.
Steps
- Create a dedicated provider API project or account, restrict its key, set an appropriate provider spending limit and choose a model already enabled for that account.
- Open Connected services > OpenAI / ChatGPT models. In the correct company or TLS scope, enter Project service account API key, OpenAI project ID, Enabled model ID in the protected form. Record the provider expiry or planned rotation date.
- Save and Verify read access. Confirm the returned identity and records with the vendor console. A failed verification stays a setup issue; it cannot be treated as a working connection.
- Enable synchronization. Review the complete paged pass and its timestamp. Search saved records and open source links only when your provider account permits it.
- For a draft, type only the approved prompt, confirm the provider-usage acknowledgment and request one draft. No customer records are attached automatically. The response is for human review and is never published or sent automatically.
- This release limits input to 12,000 characters, requests up to 2,000 output tokens and permits 20 draft attempts per provider per day. A timed-out request may still incur provider usage; it is not automatically retried.
- Pause before offboarding or credential replacement. Saving new credentials clears verification. Recycled connections retain a 60-day recovery window, with restoration paused until reverified.
Verify it works
- Minimum catalog eligibility: Professional. Selected service dependencies and an active paid subscription also apply.
- TLS platform credentials and company credentials remain separate.
- Accept one complete provider pass and a real scheduled continuation before claiming the service is connected.
If you get stuck
- Provider API usage and subscriptions are separate. A workspace license does not include unspecified model usage.
Provider documentation
Read Nora’s prepared narration
Link to this guideInternal AIAnthropic Claude setup and acceptance
Implemented; verification required
Create reviewed drafts with an authorized Claude API account. Provider usage is separate from the workspace license.
Before you start
- An authorized administrator in the correct company or the TLS owner console, with mandatory verification completed.
- Use an approved synthetic account for acceptance. Keep credentials, personal data and recovery codes out of recordings.
Steps
- Create a dedicated provider API project or account, restrict its key, set an appropriate provider spending limit and choose a model already enabled for that account.
- Open Connected services > Anthropic Claude. In the correct company or TLS scope, enter Anthropic API key, Enabled model ID in the protected form. Record the provider expiry or planned rotation date.
- Save and Verify read access. Confirm the returned identity and records with the vendor console. A failed verification stays a setup issue; it cannot be treated as a working connection.
- Enable synchronization. Review the complete paged pass and its timestamp. Search saved records and open source links only when your provider account permits it.
- For a draft, type only the approved prompt, confirm the provider-usage acknowledgment and request one draft. No customer records are attached automatically. The response is for human review and is never published or sent automatically.
- This release limits input to 12,000 characters, requests up to 2,000 output tokens and permits 20 draft attempts per provider per day. A timed-out request may still incur provider usage; it is not automatically retried.
- Pause before offboarding or credential replacement. Saving new credentials clears verification. Recycled connections retain a 60-day recovery window, with restoration paused until reverified.
Verify it works
- Minimum catalog eligibility: Professional. Selected service dependencies and an active paid subscription also apply.
- TLS platform credentials and company credentials remain separate.
- Accept one complete provider pass and a real scheduled continuation before claiming the service is connected.
If you get stuck
- Provider API usage and subscriptions are separate. A workspace license does not include unspecified model usage.
Provider documentation
Read Nora’s prepared narration
Link to this guideInternal AIGoogle Gemini setup and acceptance
Implemented; verification required
Create reviewed drafts using the selected Gemini API project and model.
Before you start
- An authorized administrator in the correct company or the TLS owner console, with mandatory verification completed.
- Use an approved synthetic account for acceptance. Keep credentials, personal data and recovery codes out of recordings.
Steps
- Create a dedicated provider API project or account, restrict its key, set an appropriate provider spending limit and choose a model already enabled for that account.
- Open Connected services > Google Gemini. In the correct company or TLS scope, enter Gemini API key, Enabled Gemini model ID in the protected form. Record the provider expiry or planned rotation date.
- Save and Verify read access. Confirm the returned identity and records with the vendor console. A failed verification stays a setup issue; it cannot be treated as a working connection.
- Enable synchronization. Review the complete paged pass and its timestamp. Search saved records and open source links only when your provider account permits it.
- For a draft, type only the approved prompt, confirm the provider-usage acknowledgment and request one draft. No customer records are attached automatically. The response is for human review and is never published or sent automatically.
- This release limits input to 12,000 characters, requests up to 2,000 output tokens and permits 20 draft attempts per provider per day. A timed-out request may still incur provider usage; it is not automatically retried.
- Pause before offboarding or credential replacement. Saving new credentials clears verification. Recycled connections retain a 60-day recovery window, with restoration paused until reverified.
Verify it works
- Minimum catalog eligibility: Professional. Selected service dependencies and an active paid subscription also apply.
- TLS platform credentials and company credentials remain separate.
- Accept one complete provider pass and a real scheduled continuation before claiming the service is connected.
If you get stuck
- Provider API usage and subscriptions are separate. A workspace license does not include unspecified model usage.
Provider documentation
Read Nora’s prepared narration
Link to this guideInternal AICursor Cloud Agents setup and acceptance
Implemented; verification required
Read existing Cloud Agent status and open Cursor for approved development work. This connection does not create agents, execute code or purchase usage.
Before you start
- An authorized administrator in the correct company or the TLS owner console, with mandatory verification completed.
- Use an approved synthetic account for acceptance. Keep credentials, personal data and recovery codes out of recordings.
Steps
- Create a scoped Cursor API key for the authorized organization and verify access to existing Cloud Agents.
- Open Connected services > Cursor Cloud Agents. In the correct company or TLS scope, enter Cursor API key in the protected form. Record the provider expiry or planned rotation date.
- Save and Verify read access. Confirm the returned identity and records with the vendor console. A failed verification stays a setup issue; it cannot be treated as a working connection.
- Enable synchronization. Review the complete paged pass and its timestamp. Search saved records and open source links only when your provider account permits it.
- Pause before offboarding or credential replacement. Saving new credentials clears verification. Recycled connections retain a 60-day recovery window, with restoration paused until reverified.
Verify it works
- Minimum catalog eligibility: Enterprise. Selected service dependencies and an active paid subscription also apply.
- TLS platform credentials and company credentials remain separate.
- Accept one complete provider pass and a real scheduled continuation before claiming the service is connected.
If you get stuck
- The API is currently beta. No agent is launched, no repository is modified and no code execution is enabled.
Provider documentation
Read Nora’s prepared narration
Link to this guideInternal AIMicrosoft 365 Copilot setup and acceptance
Implemented; verification required
Read tenant subscription SKU availability. The Copilot Chat API is currently beta and requires delegated user permissions; production chat continues in Microsoft 365.
Before you start
- An authorized administrator in the correct company or the TLS owner console, with mandatory verification completed.
- Use an approved synthetic account for acceptance. Keep credentials, personal data and recovery codes out of recordings.
Steps
- Authorize the least Graph application permission supported for subscribedSkus in your tenant, then verify the returned tenant subscription identifiers.
- Open Connected services > Microsoft 365 Copilot. In the correct company or TLS scope, enter Microsoft tenant ID, Application client ID, Client secret in the protected form. Record the provider expiry or planned rotation date.
- Save and Verify read access. Confirm the returned identity and records with the vendor console. A failed verification stays a setup issue; it cannot be treated as a working connection.
- Enable synchronization. Review the complete paged pass and its timestamp. Search saved records and open source links only when your provider account permits it.
- Pause before offboarding or credential replacement. Saving new credentials clears verification. Recycled connections retain a 60-day recovery window, with restoration paused until reverified.
Verify it works
- Minimum catalog eligibility: Professional. Selected service dependencies and an active paid subscription also apply.
- TLS platform credentials and company credentials remain separate.
- Accept one complete provider pass and a real scheduled continuation before claiming the service is connected.
If you get stuck
- This shows tenant SKU availability. Copilot Chat is a beta delegated API; production chat and per-user license assignment are not provided here.
Provider documentation
Read Nora’s prepared narration
Link to this guideReports and knowledgeExport branded knowledge and device reports
Implemented; provider delivery remains separate
Create readable PDF, Word, Excel and PowerPoint exports with the approved TLS logo and retained source content.
Before you start
- Access to the selected company knowledge or permitted device reports.
Steps
- Open Knowledge > Export article, or Export this page for the current filtered page. Select PDF, Word, Excel / Google Sheets, PowerPoint or the JSON transfer file. Page exports do not silently include records from other pages.
- Open RMM > Reports for branded device PDF, native DOCX, XLSX or PPTX. The Google Sheets action downloads the branded XLSX for import; it does not create a Sheet in a Google tenant. CSV is a separate data-only export and cannot embed an image.
- Long knowledge text continues in numbered sections. Word and Excel preserve the full exported body, summary, source, dates and version. Unknown patch and BIOS observations remain unmeasured.
- Large PowerPoint exports stop above 200 slides with an explicit message; choose fewer records or Word/Excel. Spreadsheet rows that exceed display limits fail explicitly instead of clipping silently. Device reports above 5,000 devices require a narrower scope.
- Source guide changes appear in future exports. Previously downloaded files are snapshots and do not update themselves.
Verify it works
- Only the authorized company devices and knowledge appear.
- The full TLS horizontal logo is visible and retains its original proportions.
- Formula-like source text is retained as literal spreadsheet text, not executed.
If you get stuck
- Keep the original article intact; use Word if a spreadsheet display-limit error is shown.
- PDF/Office export is not invoice delivery, live provider provisioning or native Google Sheets synchronization.
Read Nora’s prepared narration
Link to this guide